Introduction to Reverse Engineering with radare2 Cutter
Part 3: Solving a Crackme Challenge
Saturday 5th January 2019
This is part 3 of a 3 part series on reverse engineering with Cutter:
- Part 1: Key Terminology and Overview
- Part 2: Analysing a Basic Program
- Part 3: Solving a Crackme Challenge (You Are Here)
The Cutter logo.
Cutter can be found on GitHub here: https://github.com/
Skip to Section:
Introduction to Reverse Engineering with radare2 Cutter
Part 3: Solving a Crackme Challenge
┣━━ A Crackme Challenge
┣━━ Initial Observations
┣━━ Analysing the Program in Cutter
┣━━ Deciphering the Password
┗━━ Conclusion
A Crackme Challenge
Last year, I asked my friend Sam to write a basic crackme challenge for me to solve and then demonstrate in this series.
He kindly agreed, and put together a simple password-based crackme. It looks like the following when run:
malw@re:~$ ./crackme
Enter Password (or q to quit): helloworld
Access Denied
Enter Password (or q to quit): Pa$$w0rd
Access Denied
Enter Password (or q to quit): q
In this third and final part of the series, we will solve the crackme using Cutter and some other tools. If you'd like to have a go yourself first, it is available on GitHub here.
It is a beginner difficulty crackme, and most of the knowledge needed to solve it is present in the first two parts of the series (1, 2).
Please note that the source.cpp file is not obfuscated, so looking at it will potentially reveal the solution. For the best experience, compile the code without looking at the source file. Obviously running untrusted code from the internet goes against every security best-practice out there, so either use a dedicated and segregated malware analysis machine, or ask a trusted friend to check the code first.
Initial Observations
Before diving straight in and opening the file in Cutter, it's extremely valuable to try to make some initial high-level observations based entirely on the functionality of the program.
Like any form of security testing, by manipulating inputs and performing unexpected actions, you can gain a pretty deep insight into how the program works and what it is doing. For example, you may be able to spot where there is a loop, or which conditions cause the program to terminate earlier than expected.
Firstly we can try using the program without doing anything extreme or unexpected in order to see what the default/intended behaviour is:
malw@re:~$ ./crackme
Enter Password (or q to quit): 123456
Access Denied
Enter Password (or q to quit):
You can see that the program outputs "Access Denied" with a newline on the end, then prompts for the password again.
There are multiple different programming constructs that could be causing this behaviour, such as while, if/else with some gotos, try/catch, etc. Ultimately it's probably a combination of multiple.
However, what happens if you stop giving the program an input? In other words - close stdin. This is usually done by issuing Ctrl+D to your terminal:
malw@re:~$ ./crackme
Enter Password (or q to quit): Access Denied
Enter Password (or q to quit): Access Denied
Enter Password (or q to quit): Access Denied
Enter Password (or q to quit): Access Denied
Enter Password (or q to quit): Access Denied
Enter Password (or q to quit): Access Denied
Enter Password (or q to quit): Access Denied
...you get the idea - it loops infinitely. This doesn't tell you anything with certainty, but you can tell that there is definitely some sort of loop in there causing it to do this.
Another area that we can look into is how the program handles the "q to quit" functionality. There are two main ways that this can be done - requiring return (enter) to be pressed (like a normal shell prompt), or actively listening for q on stdin, like the programs less or top do.
In the case of this program, you are required to press return in order to quit the program. This knowledge gives you further insight into the design of the program, primarily the fact that it only properly reads/processes the input when a newline character is encountered. If the alternate method were in use where pressing return is not required, the internal logic of the program may be more complicated, which would be something to look out for.
Finally, we can check whether very large inputs cause the program to crash, which could help to indicate which functions are being used in the program to process input. For example, the dangerous gets() function could be used to read the inputted password, so sending a large input might help us to identify this.
malw@re:~$ printf '%.sa' {1.10000000} | ./crackme
This will send 10 Megabytes of a characters to the program. In my case, the program didn't crash - it successfully processed the data and then started looping infinitely as stdin had closed. If you are using a very old compiler or system, your results could differ, but for modern systems they probably won't.
Analysing the Program in Cutter
Now that we've gained some initial high-level insight into how the program roughly works, you can open it in Cutter and start having a look around:
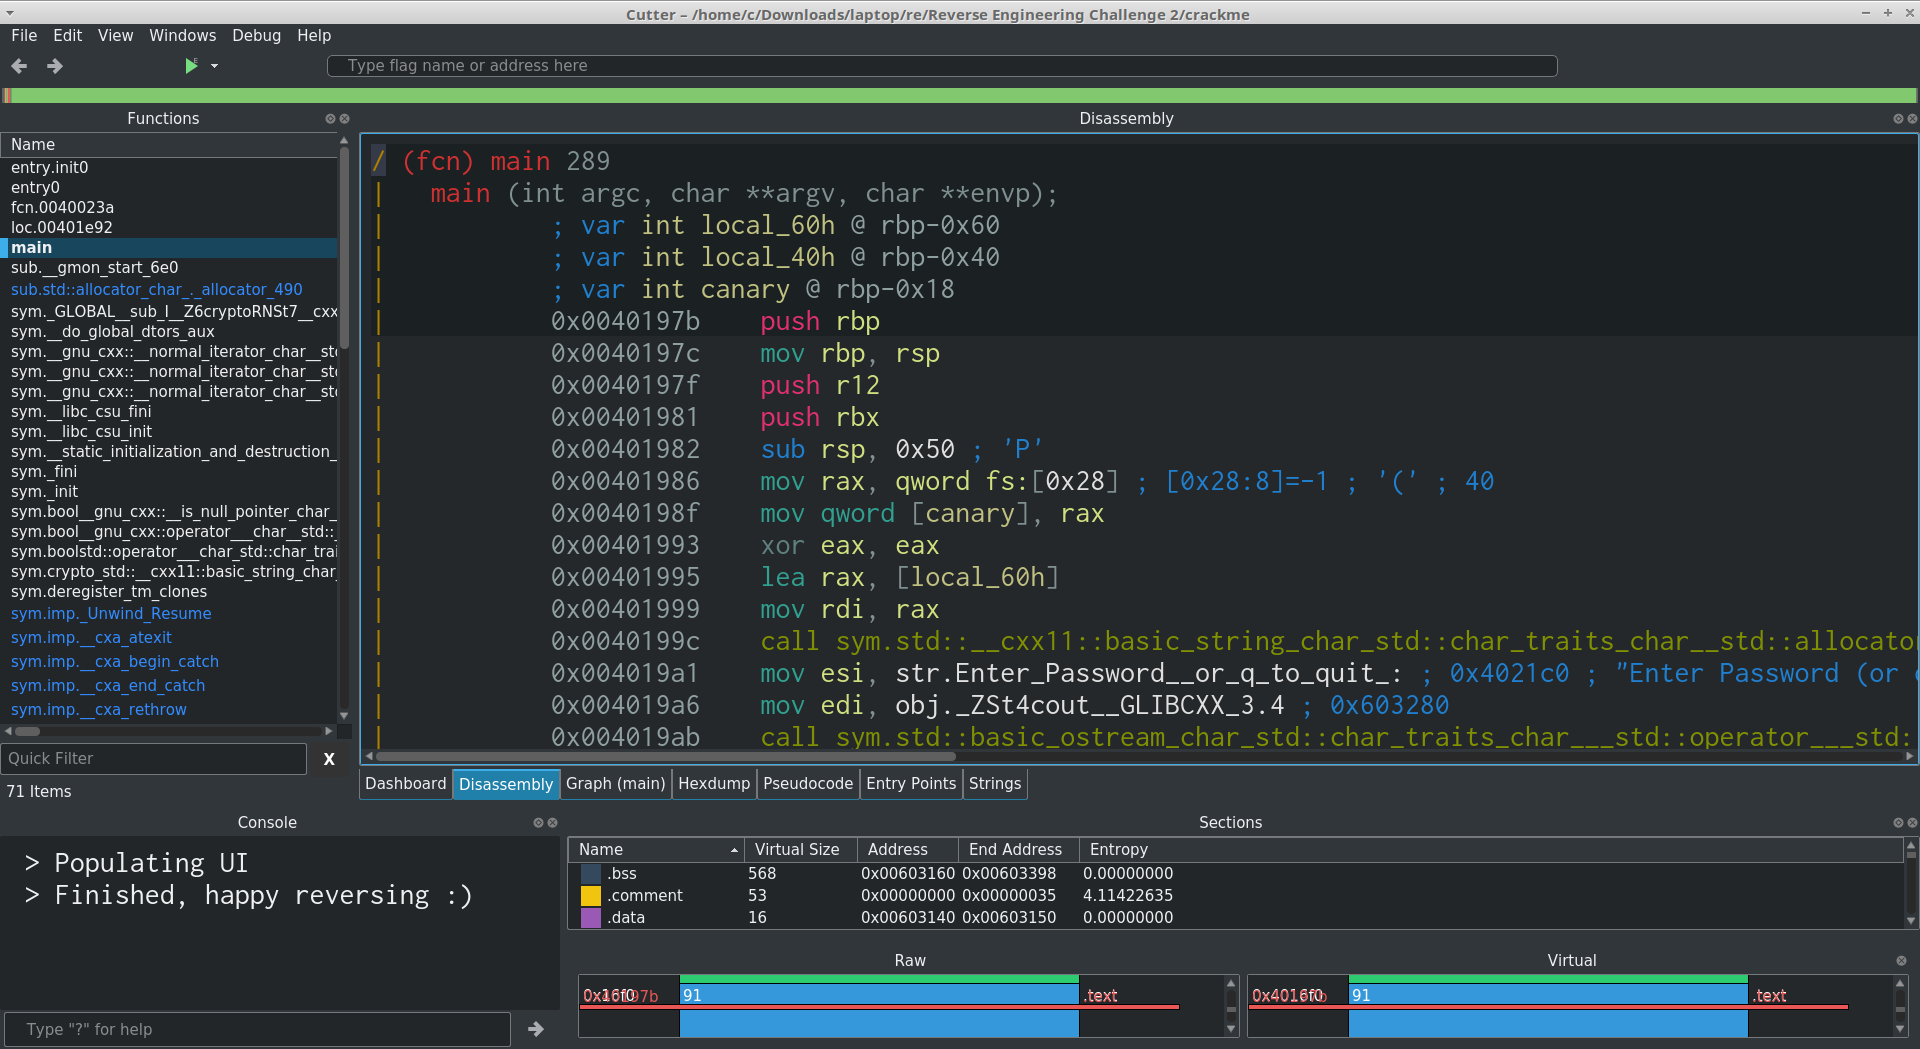
The ultimate goal of analysing the program in Cutter is to either find the password itself, or find how the password is determined or generated. The password could be stored as a raw string, it could be encoded in an arbitrary format or it might instead be derived from the input rather than simply being a comparison against a stored value.
Before rushing straight into the assembly, we can have a look at the stringdump results, as this may give some initial clues:
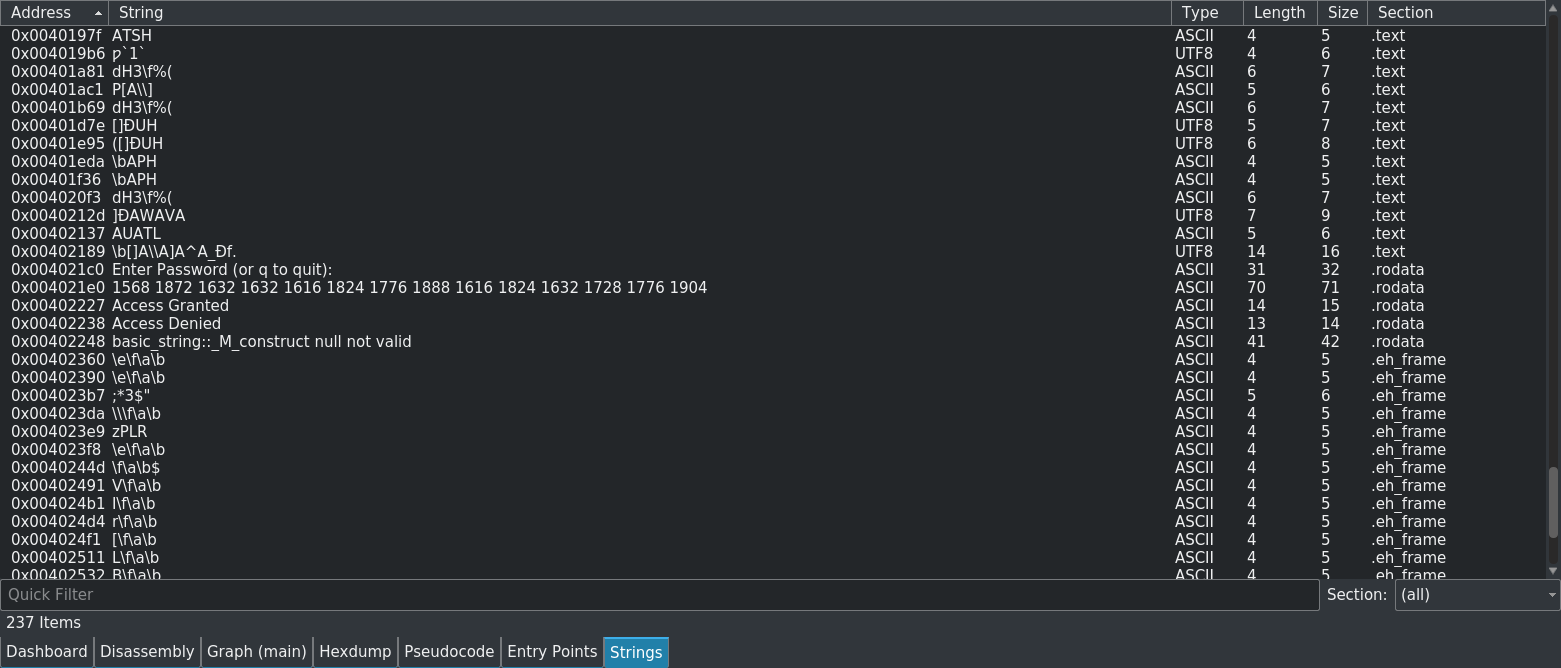
As you can see, in the stringdump output there are some strings that stand out as particularly interesting or as human-readable English. Two of these we have already seen in the live program:
Enter Password (or q to quit):
Access Denied
However there are also two new ones:
1568 1872 1632 1632 1616 1824 1776 1888 1616 1824 1632 1728 1776 1904
Access Granted
The Access Granted string is probably what is output if the password is correct. We don't know for certain, but based entirely on context we can make this assumption for now. Some more advanced crackmes may try to throw you off with things like this, but this is only a beginner level challenge so that is unlikely.
However, what we're really interested in is the long string of numbers...
1568 1872 1632 1632 1616 1824 1776 1888 1616 1824 1632 1728 1776 1904
Looking at the string, you can see that the numerals 0 to 9 are included, as well as spaces at the end of each section (including the last one).
This is our first lead - it could be the encoded password, or it could be something completely unrelated, so investigating further is required in order to help prove this theory either way.
You can try double-clicking the interesting string in the stringdump view, but this doesn't always take you to a directly useful place in the program where the string is used.
Instead, let's have a proper look at main:
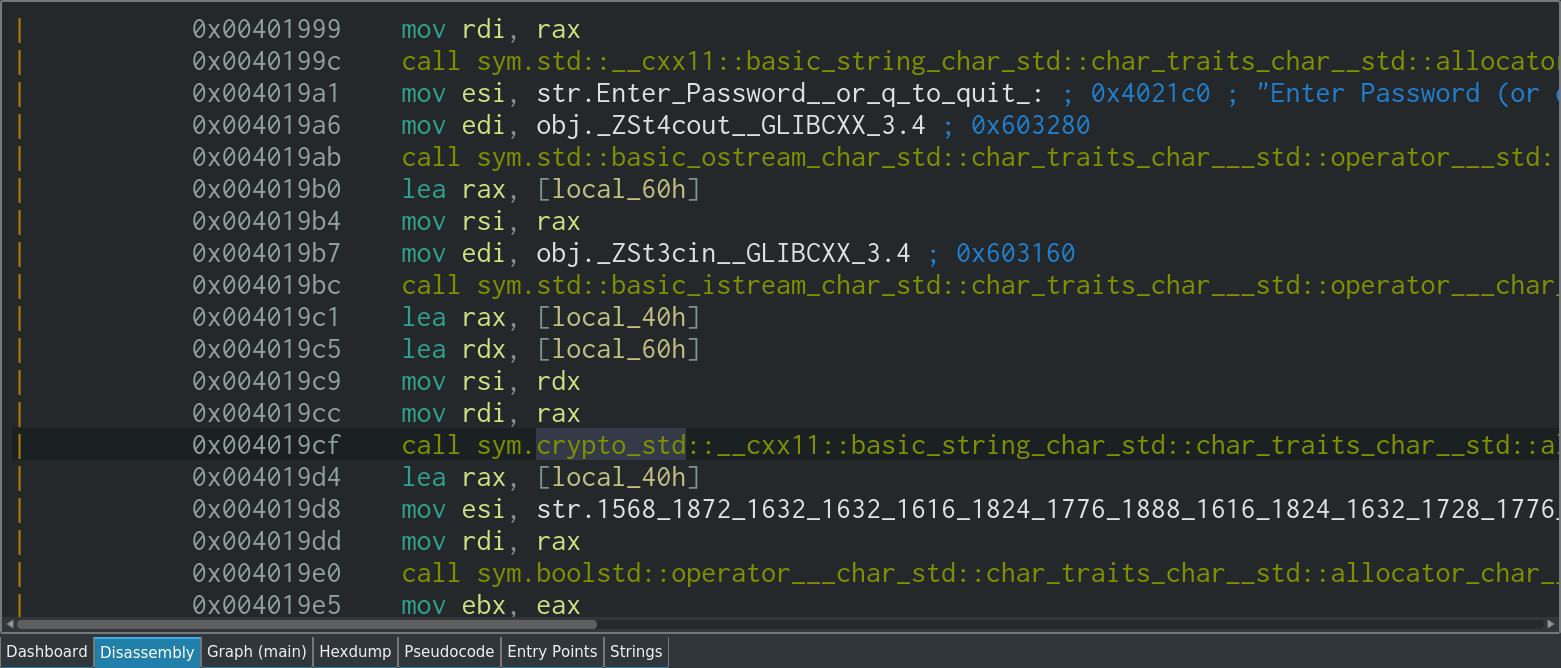
Scrolling down just slightly in the disassembly view reveals some of the strings that we found earlier, most crucially the long list of decimal numbers. Since this is a basic program and we're looking at the strings in-use in main, it's highly likely that this is where the strings are actually used to perform a useful function in the program, rather than just being assigned or moved around at a low-level.
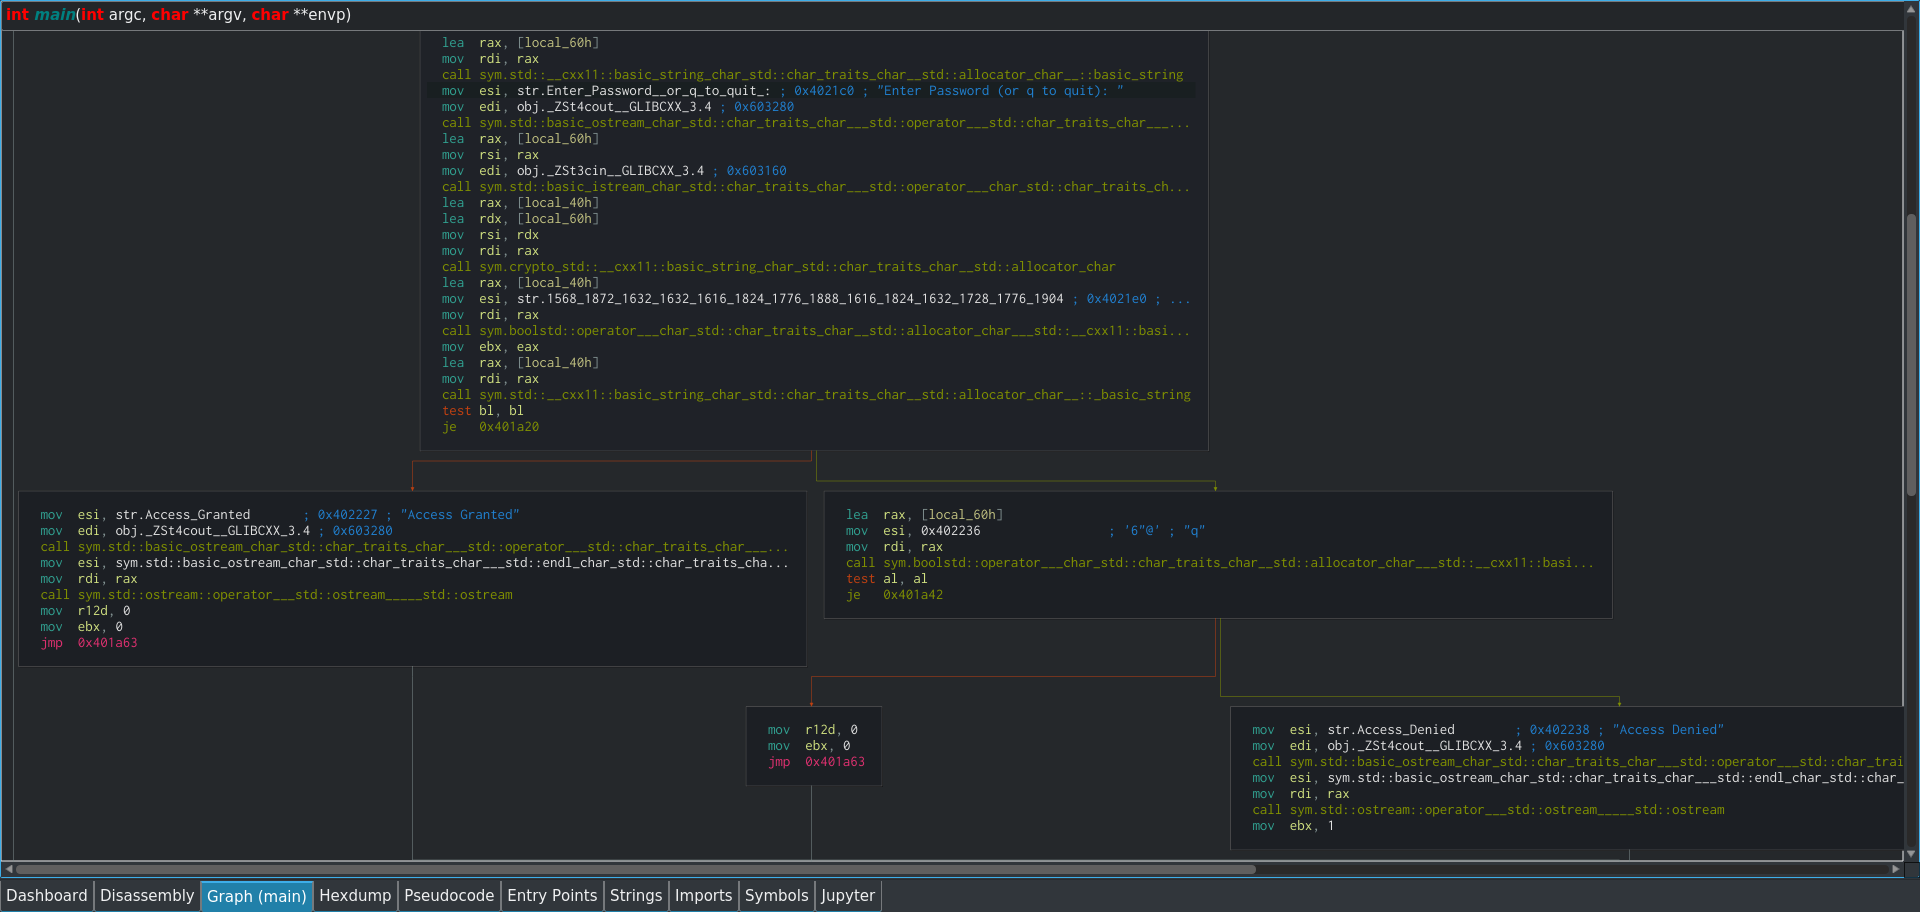
Taking a look at the graph view also helps us to understand the flow of the program, and where each of these strings are used:
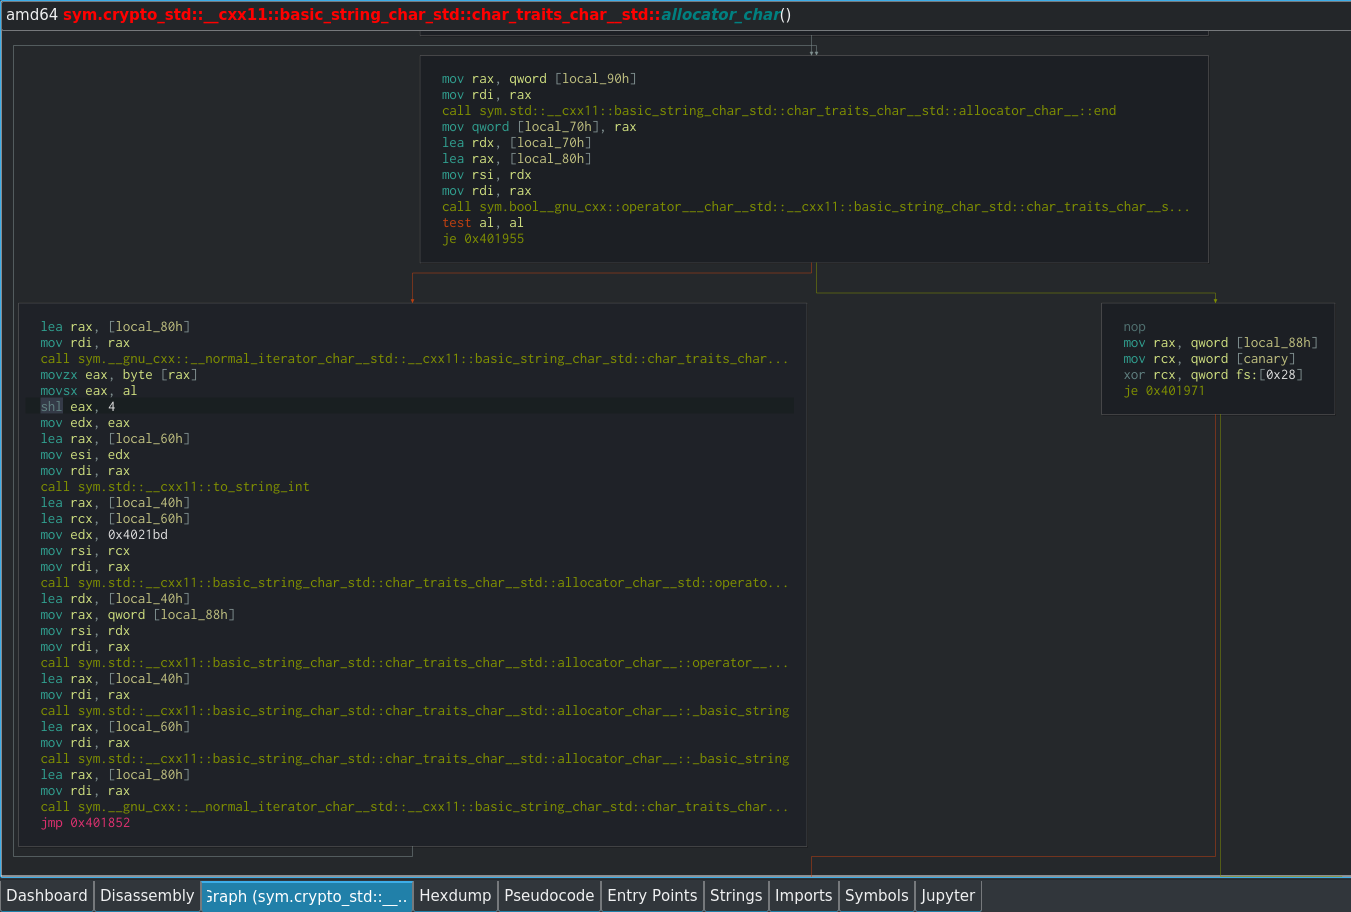
If you look closely, you may also notice a call instruction to an interesting function name; crypto_std. This function name stands out because cryptography functions wouldn't normally be used in very basic programs like this, unless they are actually doing something with cryptography.
In the case of this program, that could be the case. If the password is enciphered, the crypto_std function could well be the function responsible for performing the enciphering and deciphering. Let's take a closer look at it in the disassembly view:
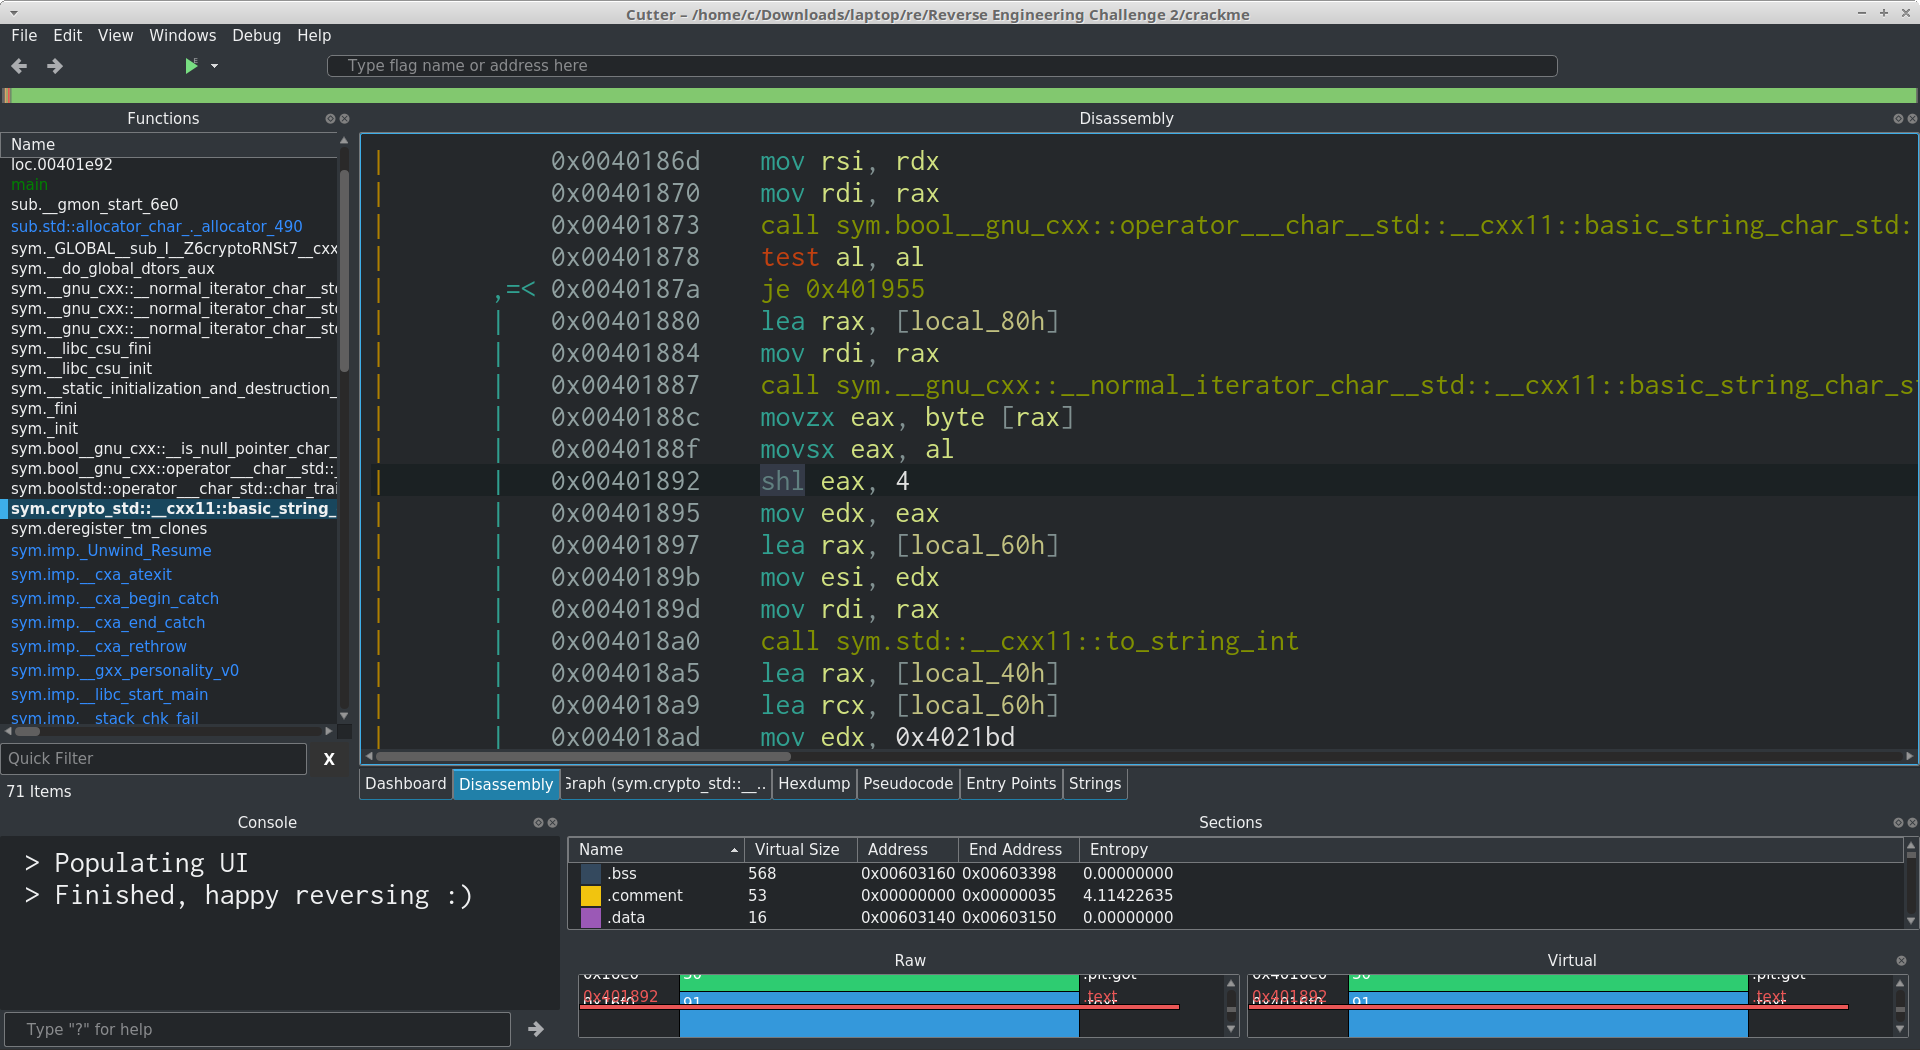
While looking through the assembly, I noticed an shl instruction with a hard-coded operand of 4. By 'hard-coded operand', I am referring to the fact that the second operand of the instruction is not a reference to a register, rather it is a static value that doesn't change throughout the execution of the program. This stood out as it is quite uncommon to see hard-coded operands in basic programs, especially on less-common instructions such as shl.
The shl instruction is used to perform bitwise shifts, or 'bitshifts' as they are more commonly referred to. The Intel syntax for shl is shl dest, src, where dest is the data to perform the bitshift on, and src is the number of bits to shift the data by.
For example, shl 01101100, 2 will result in 00011011.
This instruction could be related to the password enciphering, so we should investigate it further. In the graph view, you can see that it is part of a loop:
Scrolling down slightly further reveals the section where the function returns as well:
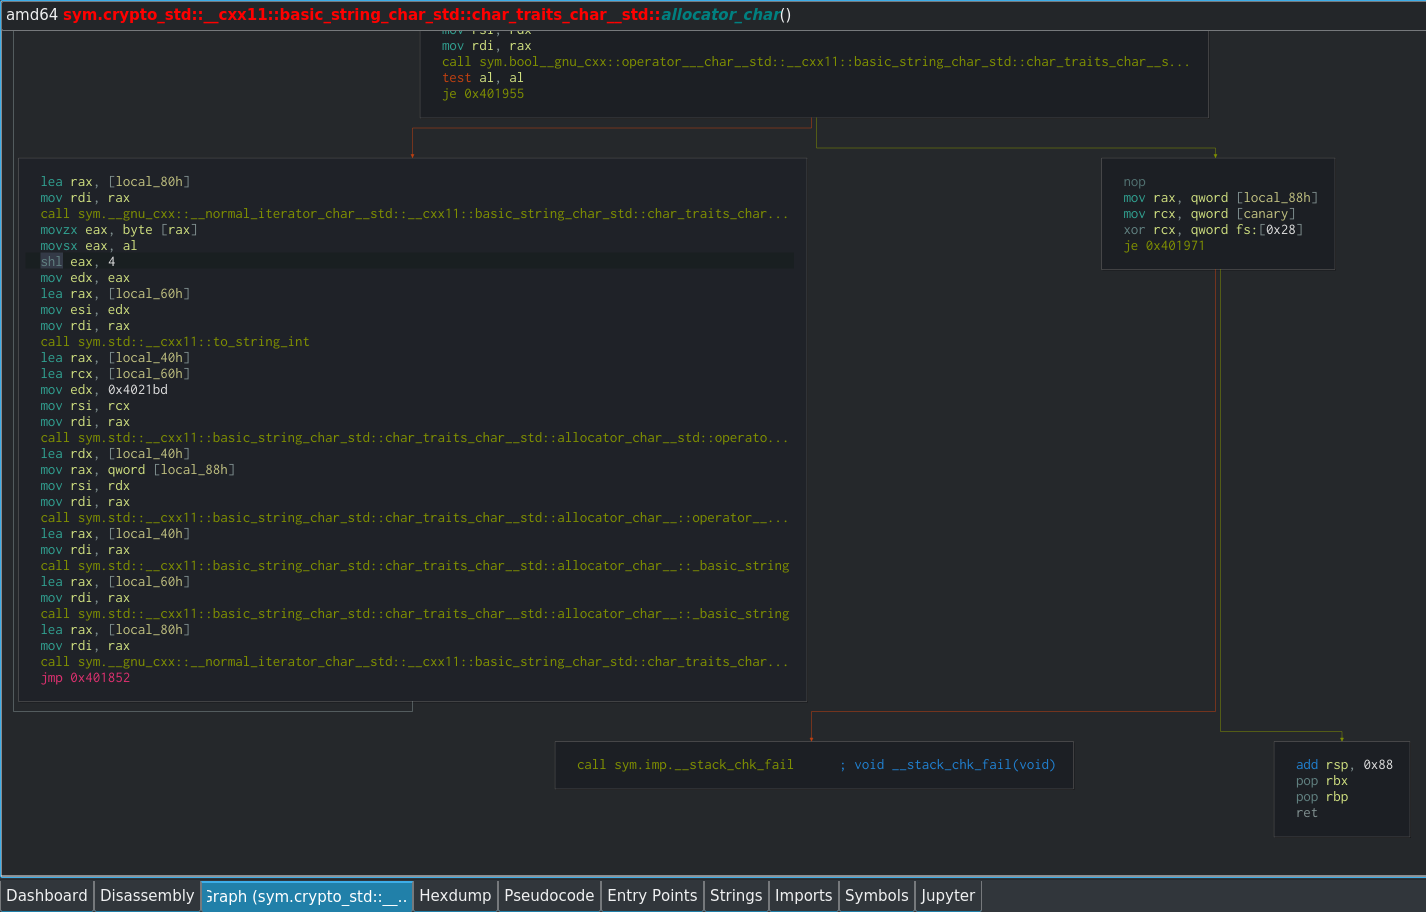
When analysing functions in the graph view, a good strategy is to find where the function returns with a ret instruction, and then work backwards in order work out which conditions need to be met for the return to take place.
Taking a look at the graph view of crypto_std, we can see that at the start of each iteration of the loop, there is a test that takes place (test al, al) in order to determine whether to continue with the loop or return from the function.
Based on the context of this function, such as where it is called and its high-level behaviour, it is fair to make a guess that the function is iterating over the long decimal string we discovered above, and shifting each character by 4 bits.
Deciphering the Password
Now that we've got a strong lead, we can make an attempt at deciphering the password using the bitshift method.
You can easily perform bitshifts using Bitwise Operators in Python 3. Let's try with the first section of the string, which is 1568:
malw@re:~$ python3
Python 3.5.2 (default, Nov 12 2018, 13:43:14)
[GCC 5.4.0 20160609] on linux
Type "help", "copyright", "credits" or "license" for more information.
>>> print(1568 >> 4)
98
This outputs 98 in decimal. If you want the output in hexadecimal instead, you can use print(hex(1568 >> 4)).
Now we can compare this against as ASCII table to see whether it matches a character. You can use man ascii in your terminal to view an ASCII table, or find one online (such as here). I have included an excerpt of the relevant section:
Oct   Dec   Hex   Char
──────────────────────────
142   98    62    b
As you can see, 98 or 0x62 is the letter b. This is promising, as that is a valid character that could be part of the password.
Instead of checking each section manually, you can create a quick Python 3 loop to do it all for you:
for i in "1568 1872 1632 1632 1616 1824 1776 1888 1616 1824 1632 1728 1776 1904".split(" "):
    print(chr(int(i) >> 4))
This will split the long decimal string at each space into elements in an array, then iterate through it. Each iteration will convert the current element to an integer (int(i)), bitshift it 4 bits to the right (>>), then convert it into an ASCII character (chr()).
When executing the program, it produces the following output:
malw@re:~$ python3 bitshift.py
b
u
f
f
e
r
o
v
e
r
f
l
o
w
And there we go... bufferoverflow!
malw@re:~$ ./crackme
Enter Password (or q to quit): bufferoverflow
Access Granted
That's it! The challenge is solved!
Conclusion
I would like to send a big thanks to Sam for creating this crackme challenge. It turned out to be a great beginner crackme!
Please also check out the other two parts of this series:
- Part 1: Key Terminology and Overview
- Part 2: Analysing a Basic Program
Cutter can be found on GitHub at: radareorg/cutter
There is an active Cutter group on Telegram which you can join at: t.me/r2cutter
You can also follow the Cutter team on Twitter: @r2gui
I personally will be continuing to use Cutter as my go-to tool for reverse engineering - it's been great so far and it's under active development so many more great features and updates are to come!
Finally, thank you to the radare2 and Cutter developers for creating and maintaining this software and allowing for a vibrant community to exist!