Introduction to BGP Routing and Security
Prelude: Connecting to the DN42 Overlay Network
Tuesday 31st March 2020
This is a prelude to a multi-part series on BGP routing and security:
- Prelude: Connecting to the DN42 Overlay Network (You Are Here)
- Part 1: BGP Peering with Quagga
- Part 2: Preventing Transit
- Part 3: Coming Soon
The purpose of this first article is to allow you to set up a suitable lab environment for practising BGP and the various routing security elements that are present in this guide.
If you already have a lab environment set up, or are working on an existing BGP deployment, you can safely skip this prelude and go straight to Part 1.
Skip to Section:
Introduction to BGP Routing and Security
Prelude: Connecting to the DN42 Overlay Network
┣━━ What is DN42?
┣━━ Accessing the DN42 Registry
┣━━ Creating Registry Objects
┣━━ Merging Your Registry Objects into the Registry
┣━━ Finding a Peer
┣━━ Connecting to Your Peer Using OpenVPN
┣━━ Dnsmasq DNS Setup for '.dn42' Domains
┗━━ Part 1 / Conclusion
What is DN42?
Decentralized Network 42, known as DN42, is a private overlay network built using thousands of distinct nodes interconnected with each other via VPN tunnels. DN42 employs routing protocols such as BGP and OSPF in order to route packets, allowing users to deploy services such as websites, IRC servers and DNS servers in a way very similar to the real internet.
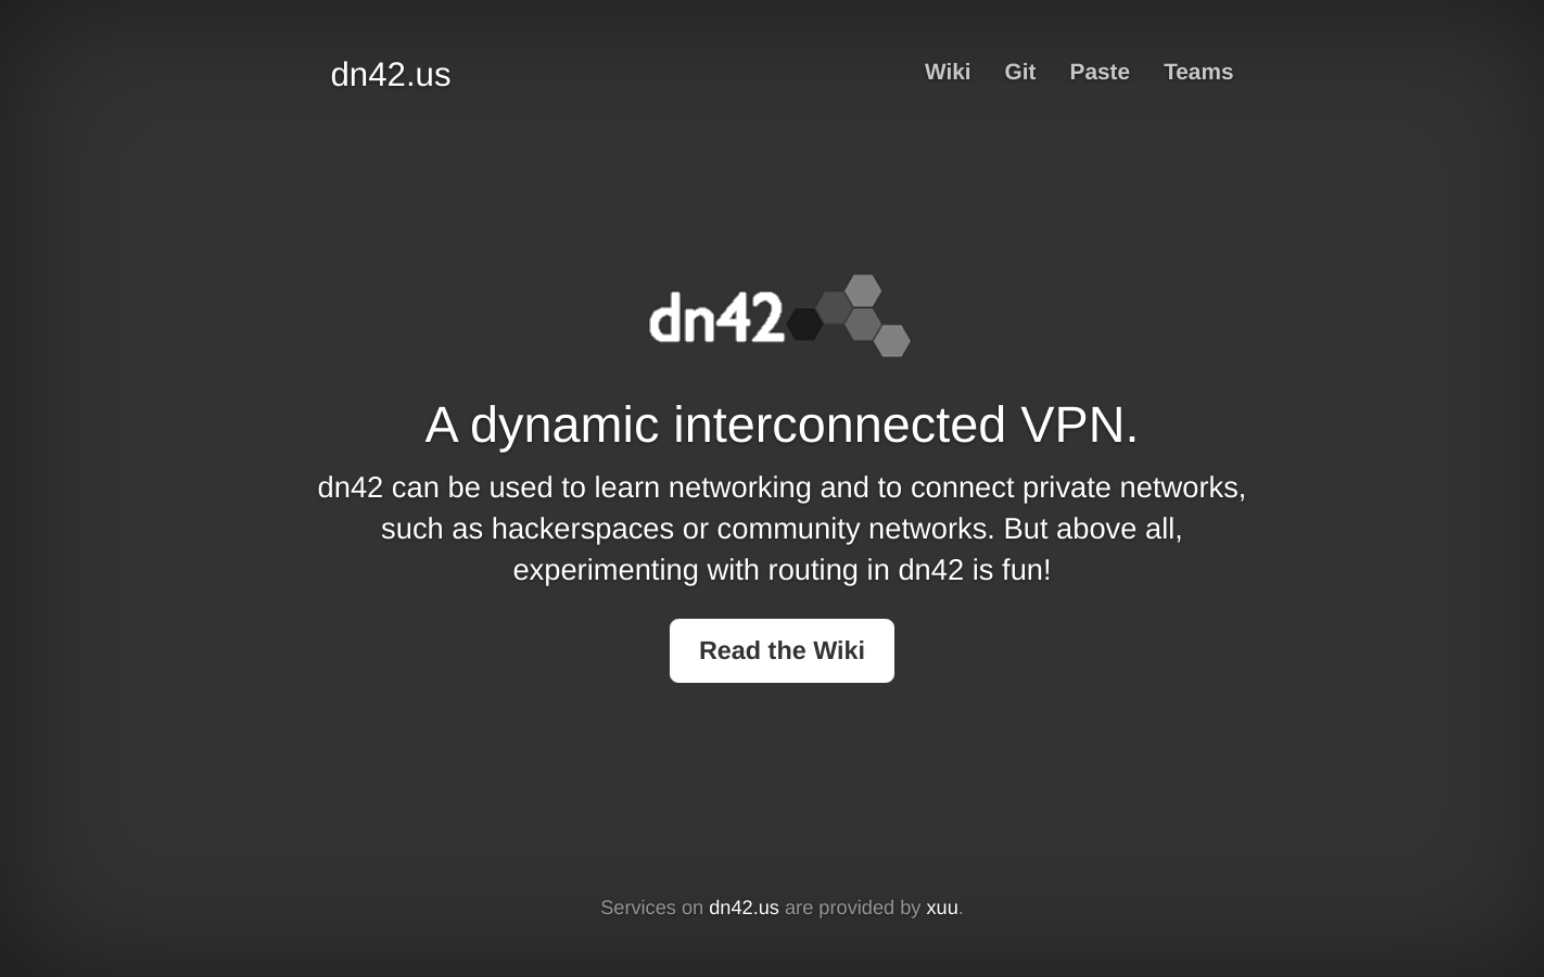
The landing page for DN42, available at dn42.us.
The DN42 network is primarily used by network and security engineers in order to provide a safe and accessible environment to practise using network technologies, as well as allowing isolated networks, such as those behind strict firewalls or NAT, to communicate with each other directly.
However, the primary selling-point for DN42 is that it provides free and realistic access to a production-like BGP environment, which is something usually reserved for network operators responsible for large enterprise networks or ISPs who are also often paying expensive registry fees.
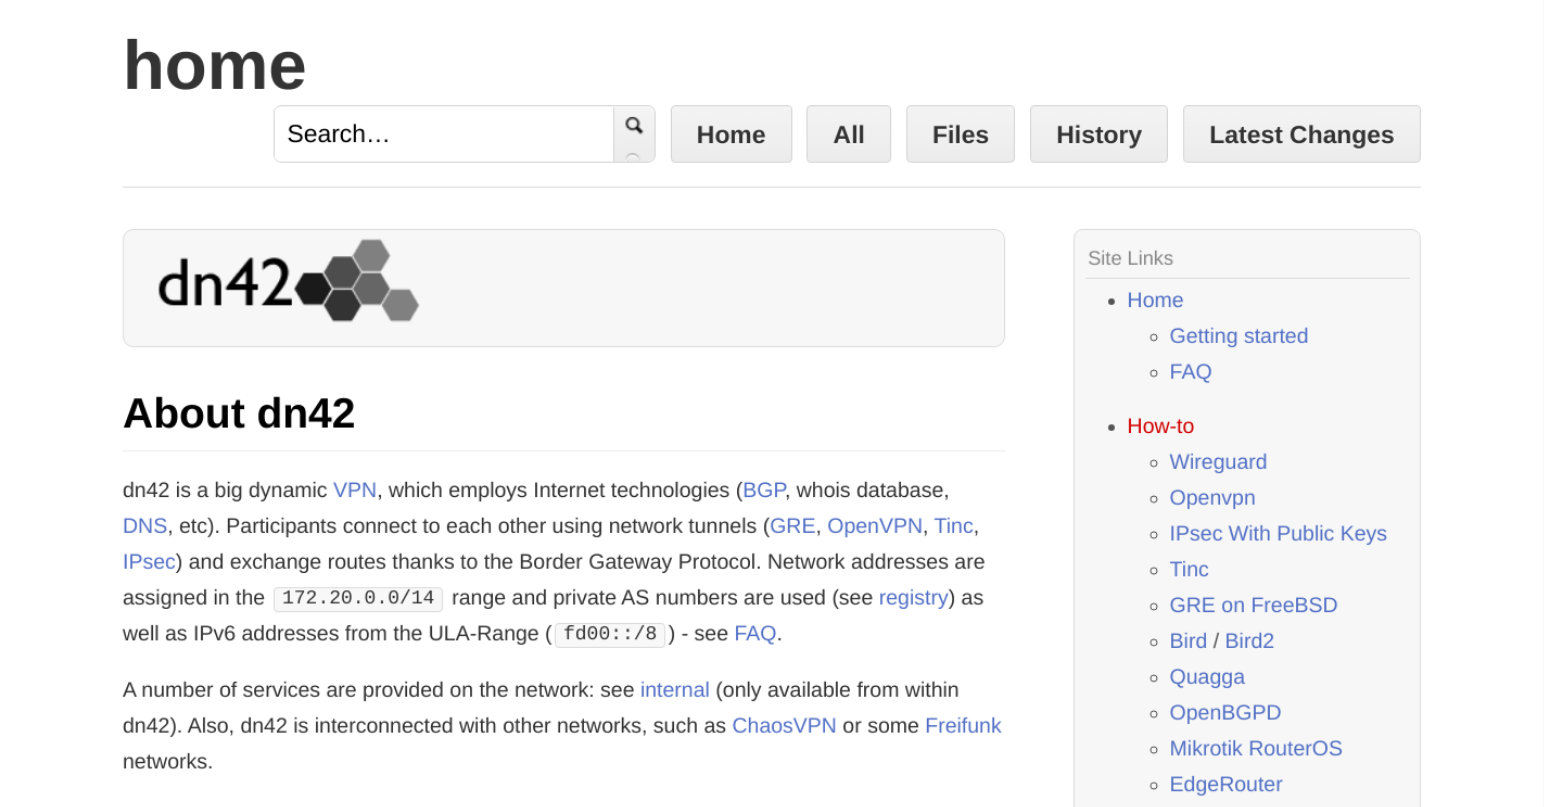
The DN42 wiki homepage, available at wiki.dn42.us.
This article will guide you through the process of registering and connecting to DN42, which is the equivalent of physically 'plugging yourself in' to the network. This won't yet let you communicate with the DN42 network fully, but it'll provide the foundation to begin BGP peering and announcing your IP address ranges to other members of the network.
While it is possible to connect to DN42 using a physical router, the most common setup is to use a standard Linux server. Any modern Linux distribution should be suitable, however in this article I am focusing on Debian-based systems such as Ubuntu Server. macOS and Windows systems are also supported if you really want them to be, however for optimal compatibility and ease of configuration, I would strongly recommend using a Linux distribution designed for use on servers.
Accessing the DN42 Registry
The DN42 registry is a central database containing all of the users of the network, the Autonomous Systems (ASs) that they maintain and the IP address ranges assigned to them.
This is equivalent to a Regional Internet Registry (RIR), such as RIPE (Europe), ARIN (North America) or APNIC (Asia Pacific).
DN42's registry is stored and operated as a Git repository, with a group of moderators responsible for reviewing and approving change requests.
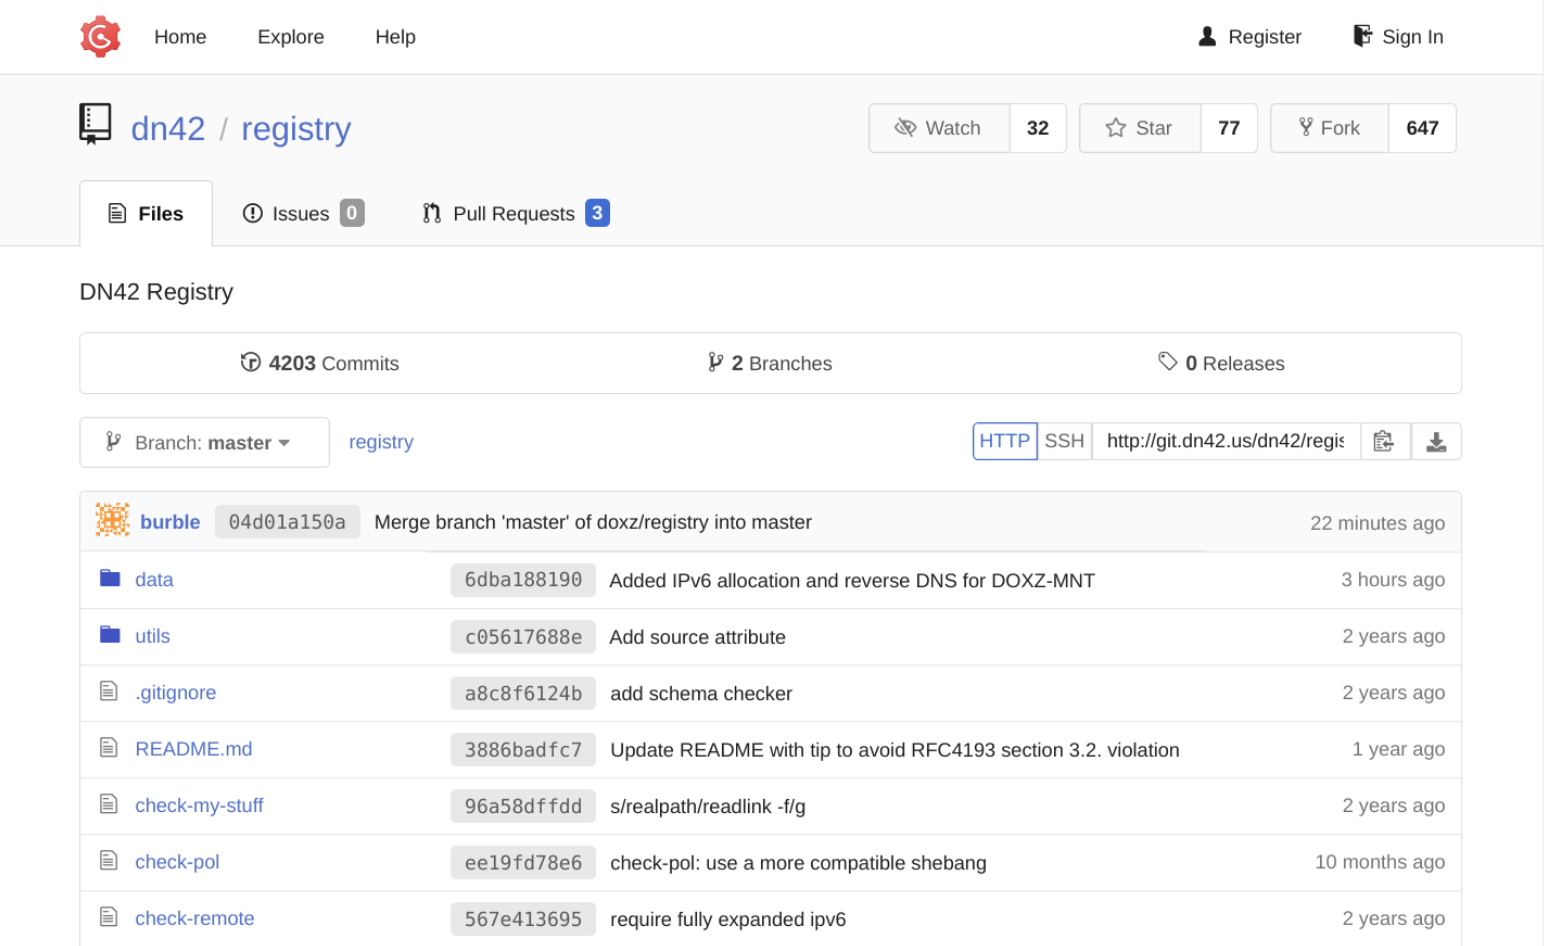
The DN42 registry, which can be accessed at git.dn42.us/dn42/registry.
In order to join DN42, you'll need to download a copy of the registry, add your information and configuration values to it (known as 'registry objects'), and then submit a change request back to the main registry.
Begin by signing up to the Git frontend for the registry. Please note that the email address that you use will be shared publicly. If you're concerned about this, I recommend creating a new alias on your domain, such as dn42@example.com or bgp@example.com.
Once you've signed up, navigate to the repository for the main DN42 registry and create a fork of it by clicking the 'Fork' button. This will create a copy of the repository within your own registry account.
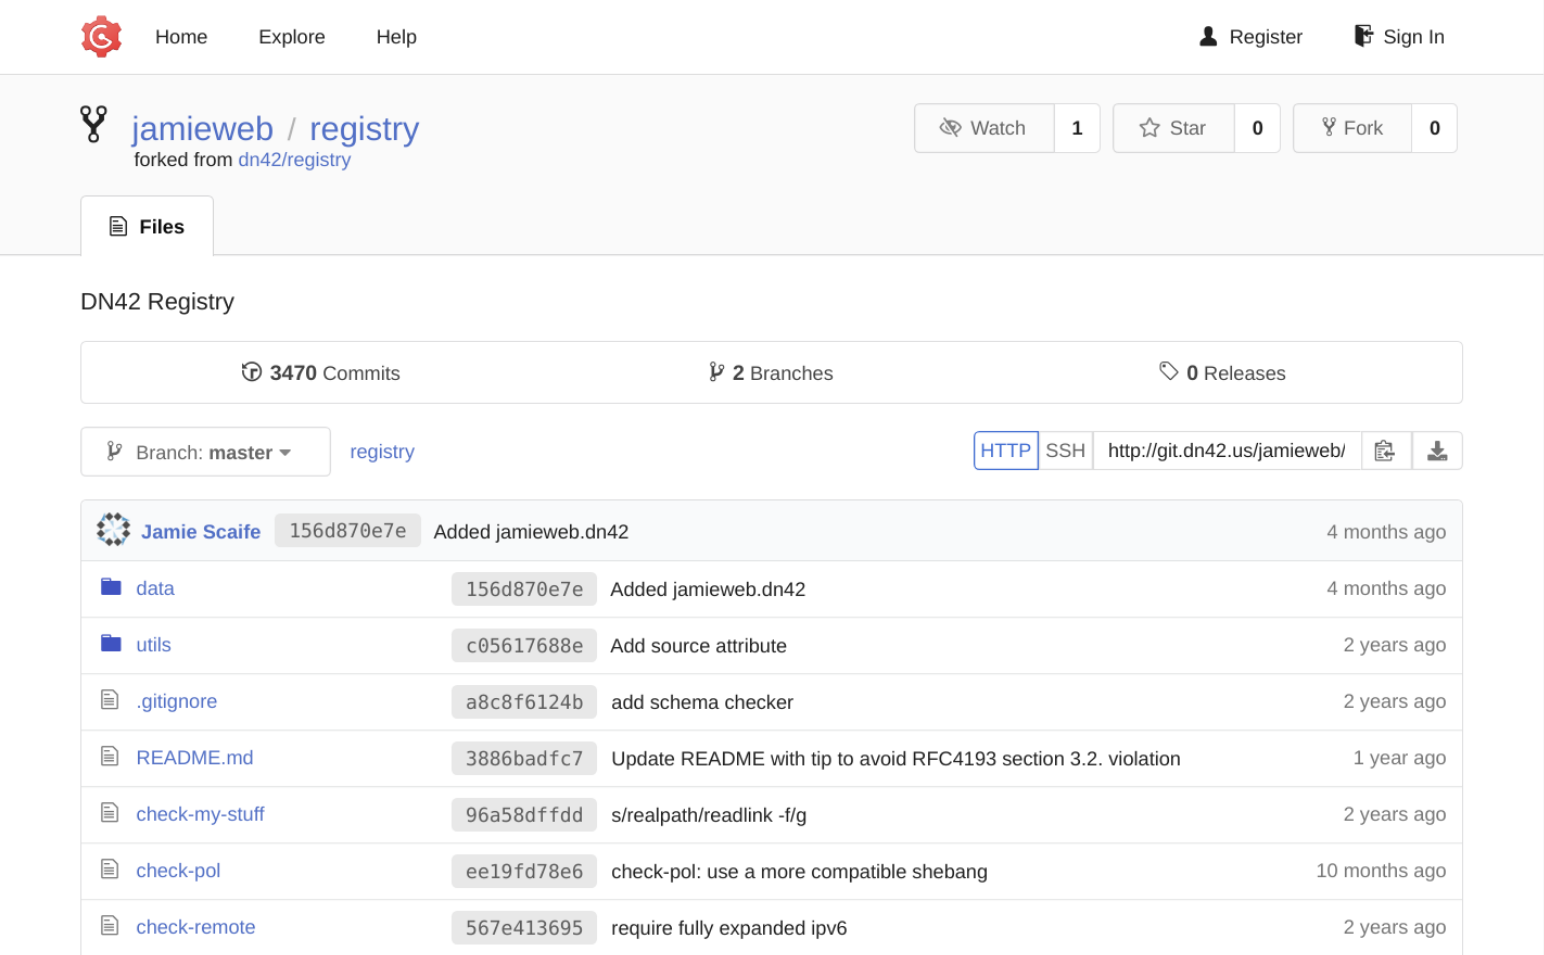
An example of a forked copy of the DN42 registry.
Next, you'll need to add an SSH public key to your registry account in order to allow you to authenticate to it using Git over SSH from the command-line. I recommend creating a new SSH key pair for this, which can be done using the following command:
$ ssh-keygen -t rsa -b 4096
Once you've generated the SSH key pair, add the public key to your registry account via your account settings, in the same way that you would add an SSH key to your GitHub/GitLab account.
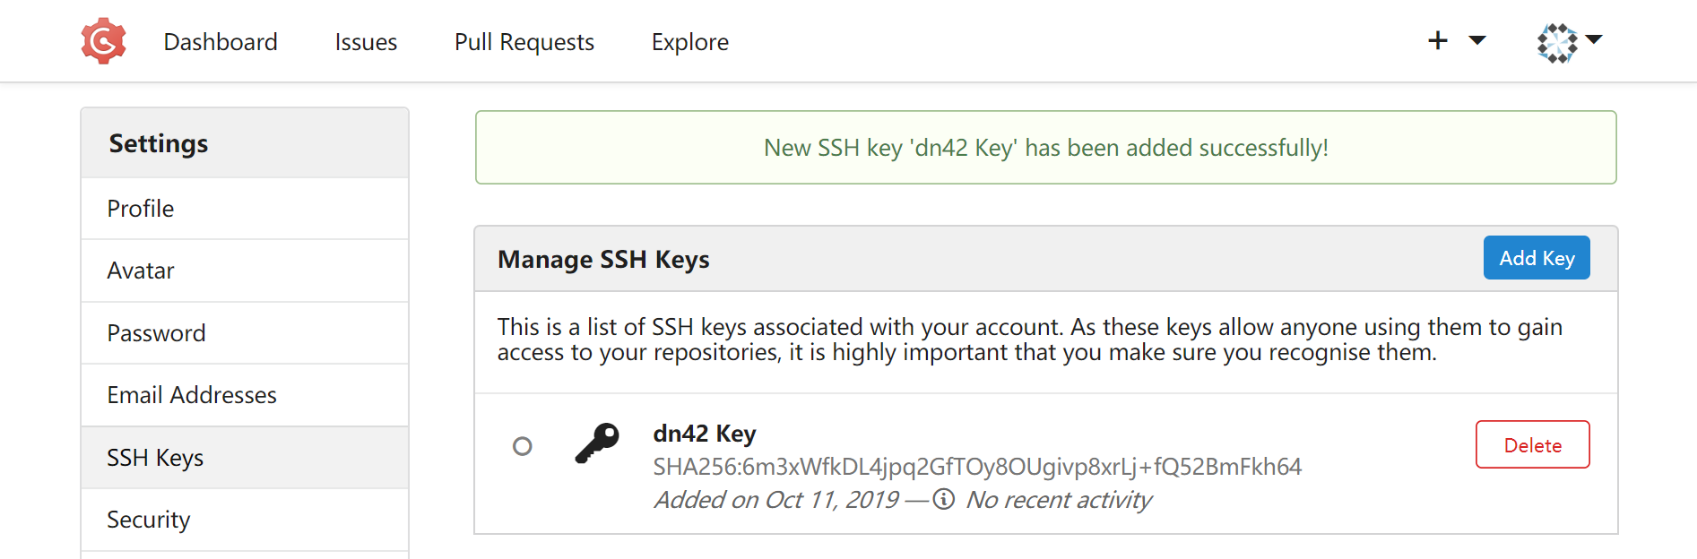
Successfully adding an SSH key to my DN42 registry account.
Each user of DN42 should sign each of their change requests using a GPG key or SSH key in order to help prevent other users from submitting malicious change requests to the registry on their behalf. The key that you use when initially creating your registry objects will need to be used to sign all future change requests in order to validate your identity, otherwise they will not be accepted by the DN42 registry moderators.
In this article we will focus on the usage of GPG, as it is the most widely used option. If you don't already have a GPG key suitable for use, you can create one using the following command:
$ gpg2 --full-generate-key
Select option #1 (rsa and rsa), and choose a suitable expiration date for the key. It may take quite some time to source enough entropy to properly generate your private key, so continue using your computer normally until it completes.
Once your key has been successfully generated, identify its full key ID by listing all of your keys:
$ gpg2 --list-keys
Find your new key in the list and take a note of the full key ID, as shown in red in the example below:
pub   rsa4096 2019-10-19 [SC] [expires: 2020-10-18]
      AB72FE12526F44B611B99F7C24B1FB13F1B3B06C
uid           [ultimate] Bob <bob@example.com>
sub   rsa4096 2019-10-19 [E] [expires: 2020-10-18]
Next, you'll need to submit your key to the public key servers, in order to allow the DN42 community to download your full key, just based on the key ID:
$ gpg2 --keyserver hkp://keyserver.ubuntu.com --send-keys your-key-fingerprint-here
Your key will appear on the Ubuntu Keyserver straight away, but may take a couple of hours to sync to the other key servers.
Before proceeding, take a secure backup of your GPG key, as losing access to it could potentially mean losing access to your DN42 resources too.
Now that you've got your SSH and GPG keys, you can proceed with connecting to the registry over SSH in order to make sure that everything is working.
In order to make sure that SSH uses the correct private key for the connection, you may wish to add the following to the bottom of your ~/.ssh/config file:
host git.dn42.us
  IdentityFile ~/.ssh/your-ssh-private-key
You can now proceed with connecting to the registry, using the -T option to prevent a terminal session from being created:
$ ssh -T git@git.dn42.us
Since this is your first time connecting, you'll be asked whether you want to accept the server host key fingerprint or not. Modern SSH clients should display the ECDSA SHA256 fingerprint, as shown below in red:
The authenticity of host 'git.dn42.us (2607:5300:60:3d95::1)' can't be established.
ECDSA key fingerprint is SHA256:NxZ5DJlVKTdS8Kv0Dcyew76iAKDAp5K7QmWUM7gLZS8.
Are you sure you want to continue connecting (yes/no)?
Double check that the fingerprint matches, and then proceed with connecting.
Once you have connected successfully, the help page for Gogs should be printed (Gogs is the Git frontend used for the DN42 registry):
NAME:
  Gogs - A painless self-hosted Git service

USAGE:
  gogs [global options] command [command options] [arguments...]

VERSION:
  0.11.86.0130
The SSH session should terminate straight after printing the above help text, but if not, press Ctrl+C or Ctrl+D to forcefully close it.
Now that you've successfully tested your SSH connection to the registry Git frontend, you can proceed with cloning your fork of the registry repository:
$ git clone git@git.dn42.us:your-registry-username-here/registry.git
This will create a complete local copy of the DN42 registry. You can freely browse the directory structure and view all of the files, as well as make your own local changes ready to be submitted back to main repository.
You should also configure Git to use your GPG key and enable forced commit signing, which can be done by running the following commands from within the registry directory:
$ git config user.signingkey your-key-fingerprint-here
$ git config commit.gpgsign true
Finally, you should update your Git name and email address to match the details used to sign up to the registry. These details will be present on each commit that you make, so ensure that you're happy for them to be shared publicly:
$ git config user.name "your-name"
$ git config user.email "your-dn42-email-address"
You have now signed up to the DN42 registry, created the required cryptographic keys, downloaded a forked copy of the registry and configured your local Git environment. Next, you can begin to create registry objects to define the Autonomous Systems, IP address ranges and domain names that you want to register.
Creating Registry Objects
The structure of the DN42 registry very closely matches that of an Internet Routing Registry (IRR) on the real internet, such as RIPE. Routing Policy Specification Language (RPSL) is used to define objects (data) within a registry, such as IP address assignments, Autonomous System (AS) numbers, maintainership permissions and personal contact details. Data submitted to a registry is shared publicly, which allows networks around the world to correctly route traffic and identify organisations responsible for different parts of the wider internet
In order to register your own network on DN42, you'll need to create a series of objects within your downloaded copy of the registry, which are stored as standard plain text configuration files. You can do this using whichever method you find easiest, e.g. using a terminal session with nano or vim, or using a GUI file manager and text editor.
Person Object
Firstly, you'll need to create a 'person' object, which is essentially a file containing your own personal details. You should specify your name, public contact email address, as well as the PGP fingerprint of the key that you have configured for use with the registry. You can also optionally specify the address of your website.
Your NIC handle (Network Information Centre handle) is a unique alphanumeric string used to identify you within the registry database, usually suffixed by the name of the registry that you're a part of, in this case -DN42. You can use any name that you want for this, including your real name or an online pseudonym, for example JOEBLOGGS-DN42 or NETWORKUSER1234-DN42. Check the contents of the /data/person directory to make sure that the string you want to use hasn't already been taken by someone else.
Proceed by creating an empty text file within the /data/person directory of the registry. The name of your 'person' object should match your NIC handle. Below is a copy of my own 'person' object, which should help you to understand the required format and layout of registry object files.
/data/person/JAMIEWEB-DN42:
person:             Jamie Scaife
contact:            bgp@jamieweb.net
www:                https://www.jamieweb.net/
pgp-fingerprint:    9F23651633635B68EC10122232920E2ACC4B075D
nic-hdl:            JAMIEWEB-DN42
mnt-by:             JAMIEWEB-MNT
source:             DN42
Note that the second column always starts at character 21 on each line, i.e. there are 20 characters padded by spaces before it on each line.
The source parameter refers to the authoritative registry that the object is registered to (always DN42 in this case). The mnt-by parameter will be covered in the next section.
Maintainer Object
Next, you'll need to create a 'maintainer' object, which is used to specify credentials that are permitted to create, modify or delete registry objects under your maintainership.
Each registry object that you create will refer back to your maintainer object, helping to ensure that unauthorised changes cannot be made to your registry objects, as well as to make sure that every registry object has a properly assigned owner.
Different methods exist for specifying authentication information, however in most cases within DN42's registry, a PGP key fingerprint is used. Some other registries, such as RIPE, implement their own single sign-on system for authentication and authorisation. Historically, some registries allowed you to specify the MD5 hash of a password within your maintainer object, which is a process that has luckily been mostly phased out by now.
Below is a copy of my own maintainer object, which will help you to understand and populate the required fields. Make sure to update the PGP fingerprint to your own.
/data/mntner/JAMIEWEB-MNT:
mntner:             JAMIEWEB-MNT
admin-c:            JAMIEWEB-DN42
tech-c:             JAMIEWEB-DN42
mnt-by:             JAMIEWEB-MNT
source:             DN42
auth:               pgp-fingerprint 9F23651633635B68EC10122232920E2ACC4B075D
You may recognise the admin-c and tech-c configuration parameters from domain name WHOIS records. These are used to specify the administrative and technical contacts for your maintainer object, which in the case of DN42, should usually refer back to your own 'person' object.
Autonomous System (AS) Number
An Autonomous System refers to a collection of IP address range assignments that belong to a single administrative entity, such as a business or individual. Each AS has an AS number (ASN), which is used to uniquely identify it within internet routing policies.
You can find the AS that you're a part of using the Hurricane Electric BGP toolkit. You'll most likely see the AS of your ISP or upstream network provider, such as BT, Comcast, Telstra, etc.
You can register your own ASN at a RIR, however the prerequisites and costs are often prohibitive for individuals or small businesses. For example, you may have to provide evidence of having contracts in place with upstream network providers, or have to be sponsored by an existing member of the RIR.
Luckily within DN42, you can freely register an ASN for use within the network. Unfortunately it isn't usable outside of DN42, but the technical concepts for managing it are very similar.
DN42 currently allocates ASNs from the range AS4242420000 to AS4242423999. My own AS number on DN42 is AS4242420171.
Begin by searching through the DN42 registry to identify an unclaimed ASN. Most of the ASNs towards the start of the allowed range have already been taken, so you may wish to start looking half way down the list.
Once you have identified an unclaimed ASN, proceed with creating an object in the registry for it, using my example below for guidance.
/data/aut-num/AS4242420171:
aut-num:            AS4242420171
as-name:            JAMIEWEB-AS
descr:              JamieWeb AS
admin-c:            JAMIEWEB-DN42
tech-c:             JAMIEWEB-DN42
mnt-by:             JAMIEWEB-MNT
source:             DN42
The as-name and descr parameters can be used to add a human-readable name and description to your AS. Also notice how you are referring back to your person and maintainer objects with the admin-c, tech-c and mnt-by parameters.
IPv4 Address Range Assignment
Now that you've claimed an ASN, you can proceed to allocate and assign an IPv4 address range for your use on DN42. Like on the real internet, IPv4 addresses on DN42 are in short supply, so you'll only be able to claim a small prefix as an individual. You'll be able to get a large IPv6 address range though, which is covered in the next step.
DN42 uses the following private IPv4 address ranges:
172.20.0.0/14- DN42 Main Network172.20.0.0/24- Anycast Network172.21.0.0/24- Anycast Network172.22.0.0/24- Anycast Network172.23.0.0/24- Anycast Network
The anycast network is used to operate core DN42 network services such as the root DNS servers, where any DN42 member is able to anycast announce the relevant IP addresses and host their own root DNS server for use by the community.
Like when assigning an ASN, you'll need to search through the registry in order to identify an unclaimed IPv4 address range. To make things a bit easier, you can use the IPv4 open netblocks page to see a list of unclaimed prefixes.
A list of open IPv4 netblocks on DN42, accessible at dn42.us/peers/free.
Once you have found a suitable IPv4 address range, you can create the registry object for it, using the example of my own IPv4 range for reference.
/data/inetnum/
inetnum:            172.20.32.96 - 172.20.32.111
cidr:               172.20.32.96/28
netname:            JAMIEWEB-V4-NET-1
country:            GB
admin-c:            JAMIEWEB-DN42
tech-c:             JAMIEWEB-DN42
mnt-by:             JAMIEWEB-MNT
status:             ASSIGNED
source:             DN42
You'll need to specify the exact IP address range within the inetnum configuration value, so make sure to double-check your subnet calculation where necessary.
In order to actually announce your IPv4 address range, you must create a 'route' object, which is used to specify which AS is permitted to announce the prefix.
In many cases this will be your own AS, however if you want someone else, such as a network operator, to announce the prefix on your behalf, you'll need to specify their ASN here. Delegating the permission to announce a particular prefix like this allows you to more safely utilise the services of third-party network operators, whilst still retaining full legal ownership of your prefixes.
Proceed with creating the route object as required, using my own as an example.
/data/route/
route:              172.20.32.96/28
origin:             AS4242420171
mnt-by:             JAMIEWEB-MNT
source:             DN42
IPv6 Address Range Assignment
You should also assign yourself an IPv6 address range. Within DN42, IPv6 uses the Unique Local Address (ULA) range, which is fd00::/8.
You should generate a random prefix rather than trying to directly choose one, which can be done using an IPv6 ULA generator.
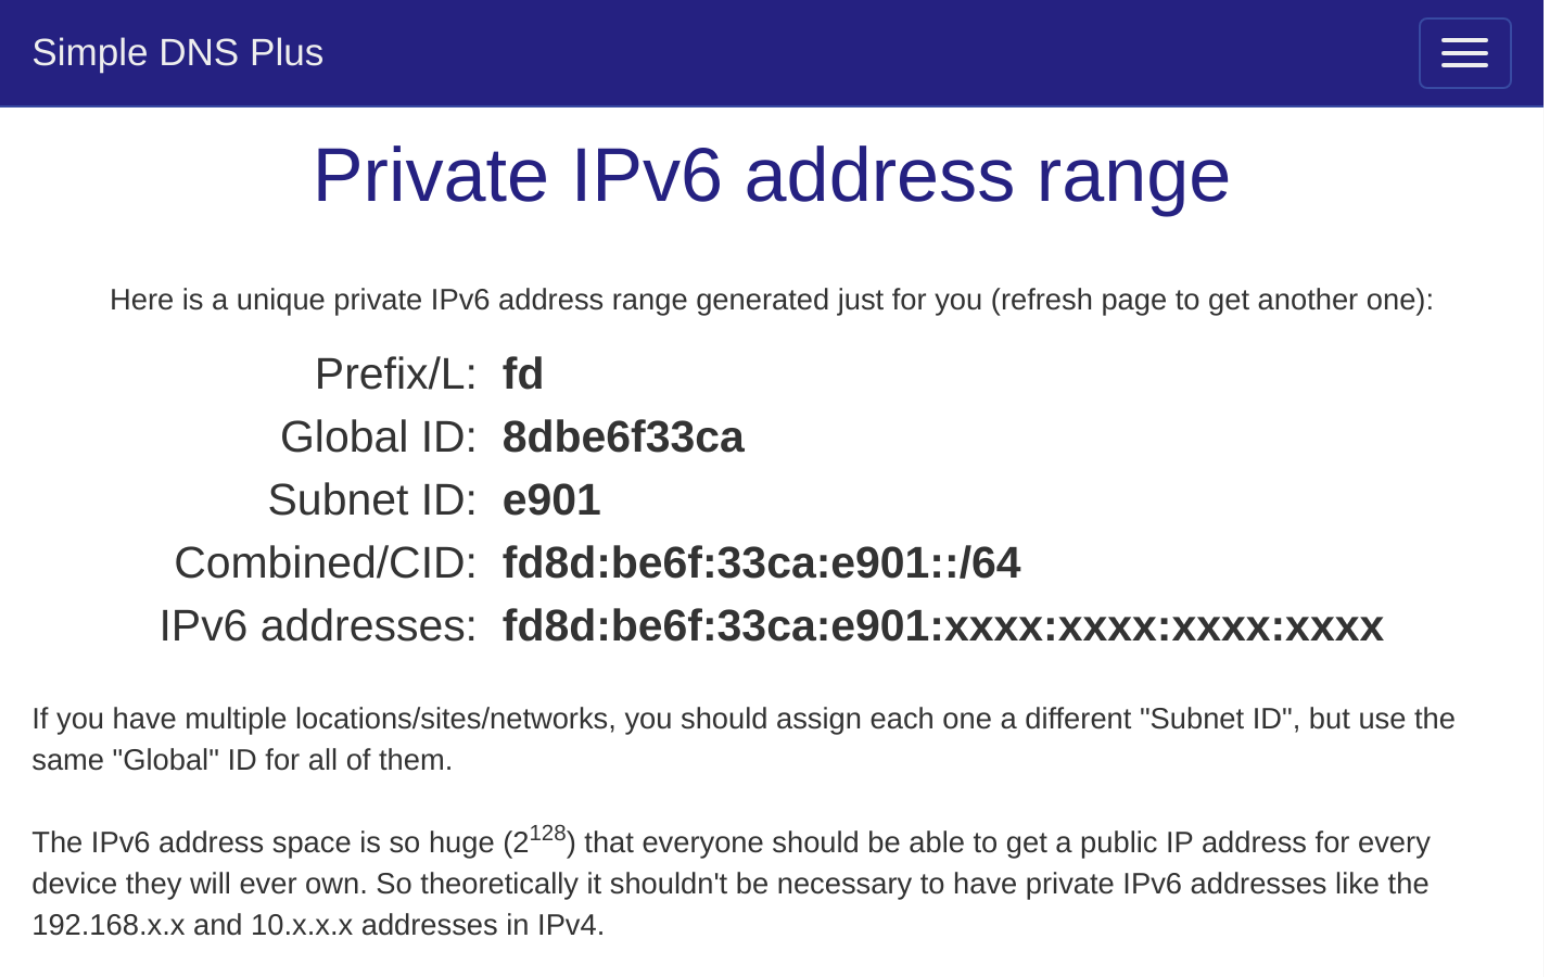
The IPv6 ULA generator provided by Simple DNS, available at simpledns.com/private-ipv6.
Once you've generated your own ULA range, create the registry object for it using my own below for guidance.
/data/inet6num/
inet6num:           fd5c:d982:d80d:9243:0000:0000:0000:0000 - fd5c:d982:d80d:9243:ffff:ffff:ffff:ffff
cidr:               fd5c:d982:d80d:9243::/64
netname:            JAMIEWEB-V6-NET-1
country:            GB
admin-c:            JAMIEWEB-DN42
tech-c:             JAMIEWEB-DN42
mnt-by:             JAMIEWEB-MNT
status:             ASSIGNED
source:             DN42
Like with your IPv4 range, you'll also need to create a route object in order to authorise the prefix to be announced by the relevant AS.
/data/route6/
route6:             fd5c:d982:d80d:9243::/64
origin:             AS4242420171
mnt-by:             JAMIEWEB-MNT
source:             DN42
.dn42 Domain Name Registration (Optional)
Within DN42, you can also optionally register your own domain name under the .dn42 top-level domain (TLD). You can then use this to operate named services within DN42, such as websites or IRC servers.
Registering a domain name isn't required in order to enjoy the low-level networking aspects of DN42, however if you would like one, you can use the example below in order to create a registry object for it.
/data/dns/jamieweb.dn42:
domain:             jamieweb.dn42
descr:              JamieWeb
admin-c:            JAMIEWEB-DN42
tech-c:             JAMIEWEB-DN42
mnt-by:             JAMIEWEB-MNT
nserver:            ns1.jamieweb.dn42 172.20.32.97
nserver:            ns1.jamieweb.dn42 fd5c:d982:d80d:9243::2
source:             DN42
The nserver parameters are used to specify the glue records for your domain, which include the DNS name of each name server and its associated IP address. In my case, I have specified a primary name server with both an IPv4 and IPv6 address from my assigned ranges.
Once you're properly set up and connected to DN42, you can then run an authoritative DNS server for your domain, which will allow other members of DN42 to resolve it and access your named services.
Validating Your Registry Objects
The DN42 registry repository includes three validation scripts that can be run against your registry objects in order to help ensure that they are syntactically correct and accurate prior to being reviewed by the DN42 moderators.
The scripts are present in the root of the repository. You should run each of these accordingly and check for any errors or warnings before proceeding:
./fmt-my-stuff YOURNAME-MNT- Automatically fix minor formatting errors../check-my-stuff YOURNAME-MNT- Validate your objects against the DN42 registry schema../check-pol origin/master YOURNAME-MNT- Check for routing policy violations.
These scripts will also be run automatically by the DN42 registry Continuous Integration (CI) system when you submit your changes to the registry, with the output being shared as a pull request comment.
Merging Your Registry Objects into the Registry
Now that you've created all of the required registry objects, you need to submit these to the registry for approval.
This is done by creating a Git pull request/merge request, which once reviewed by the DN42 registry moderators, will allow your registry objects to be seamlessly merged into the main DN42 registry.
Begin by adding your newly created registry objects to your local Git index, ready to be committed. You can use the following command from the root of the registry repository:
$ git add .
Next, commit the changes to the repository:
$ git commit
Enter a suitable commit message, e.g. 'Added AS424242xxxx'. You should then be asked for your GPG passphrase to cryptographically sign your commit.
Once the changes have been successfully committed, push them up to your fork of the repository on the DN42 registry Git server:
$ git push origin master
If you browse to your fork of the registry in your web browser, you should now see that your registry objects have been uploaded successfully.
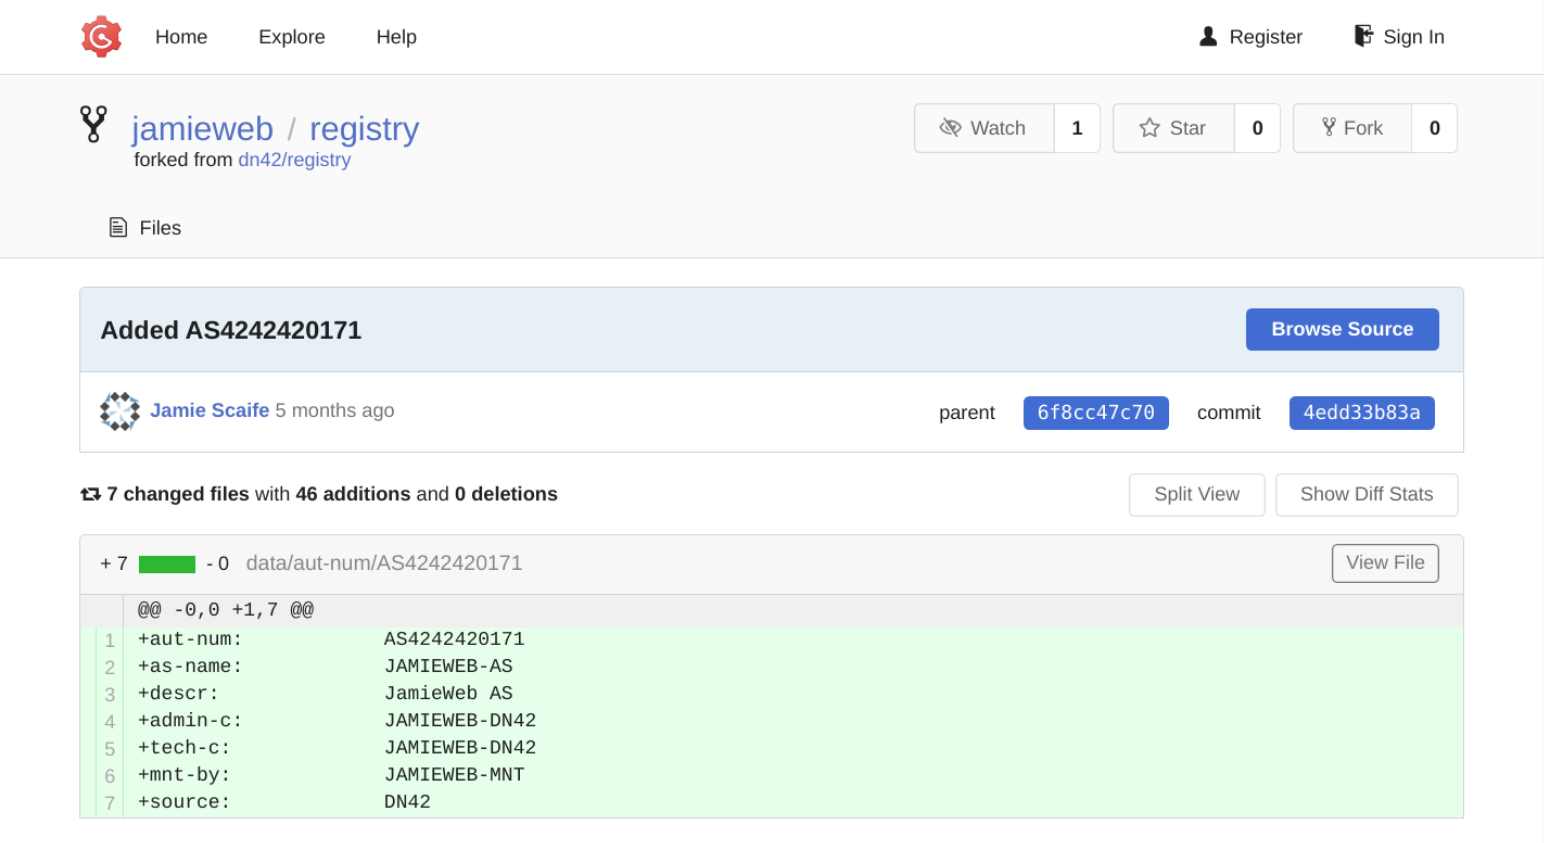
My forked copy of the DN42 registry, showing the commit for my initial submission.
You now need to create a pull request at the main DN42 registry, in order to request for your changes to be merged in. This can be done by clicking the 'New Pull Request' button from the main DN42 registry repository.
You can add a name and description to your pull request, and you should also be able to see a summary of the changes that you made locally.
All of the pull requests submitted by other members of DN42 are also publicly visible, so you may wish to review some of these to double-check that your submission is in-line with the others.
Once you've submitted your pull request, it will be visible in the DN42 main registry waiting for moderator review.
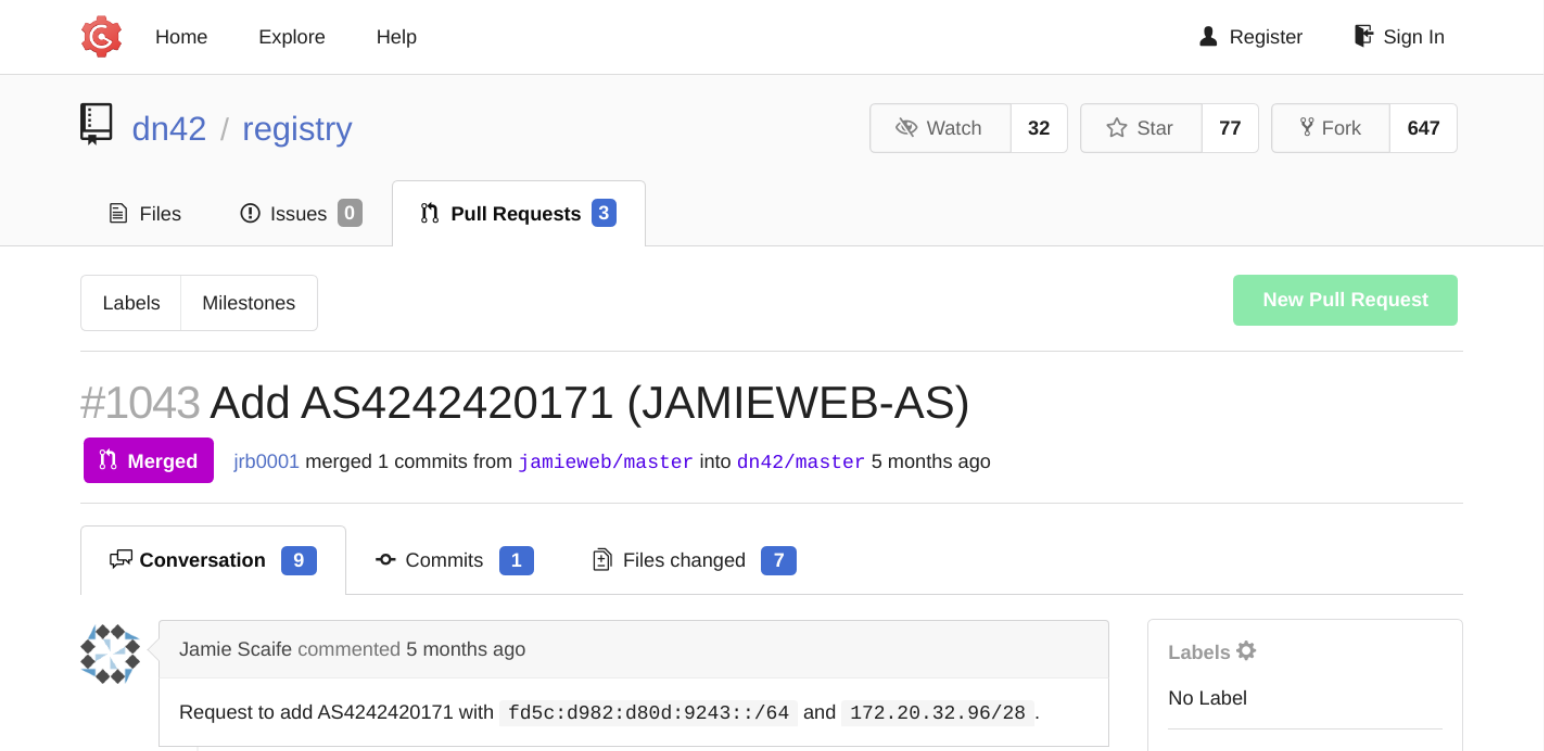
The pull request that I originally submitted to join DN42 as AS4242420171.
It may take a few hours or days for your submission to be reviewed by the DN42 moderators. Keep checking your pull request as they may add comments to ask further clarifying questions or to ask you to fix any mistakes.
In the event that there is a mistake in your submission and you need to resubmit, the easiest way to do this is to softly roll-back the commit that you made (this will not overwrite or delete any of your changes):
$ git reset HEAD~1
Then make the required fixes or adjustments, and commit and push them back to your forked repository:
$ git add .
$ git commit
$ git push origin master
Once this is complete, your pull request will have been automatically updated with the new changes. You don't need to manually submit another one unless you committed further changes to your repository between making your initial submission and implementing the fixes or adjustments.
Finding a Peer
In order to actually get connected to DN42, you'll need to find at least one peer. This is an individual or organisation who is willing to provide you with a VPN tunnel into the DN42 network, which you can then BGP peer through to announce your IP address ranges. This is equivalent to an upstream network provider.
Peering usually takes place over a Wireguard or OpenVPN tunnel, with GRE, IPsec and PPTP being used in some cases too. You could also peer with someone via a physical link if you really wanted to, though in reality that is quite impractical unless you are physically proximate.
Many prominent members of DN42 will happily peer with you if you ask nicely via email or IRC. Others offer 'open peering' or 'automatic peering', which is where you're able to peer with them either semi-automatically by filling out a sign-up form, or in some cases fully automatically using a command-line wizard interface.
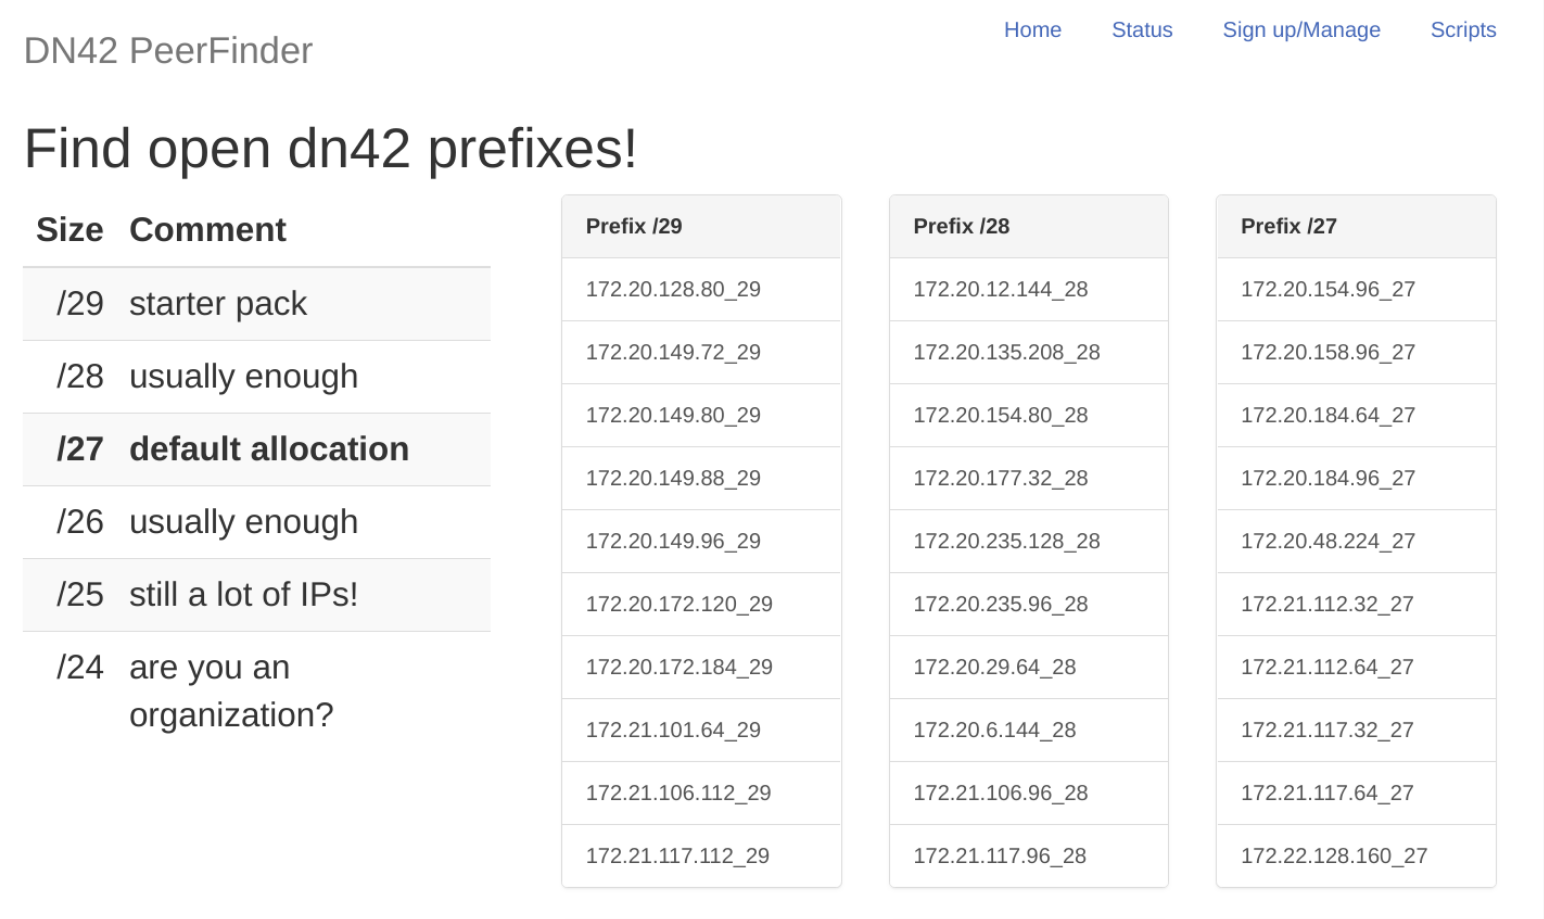
In order to identify a suitable peer, which is ideally one located within the same continent as you and accessible over a low-latency connection, you can use the DN42 PeerFinder.
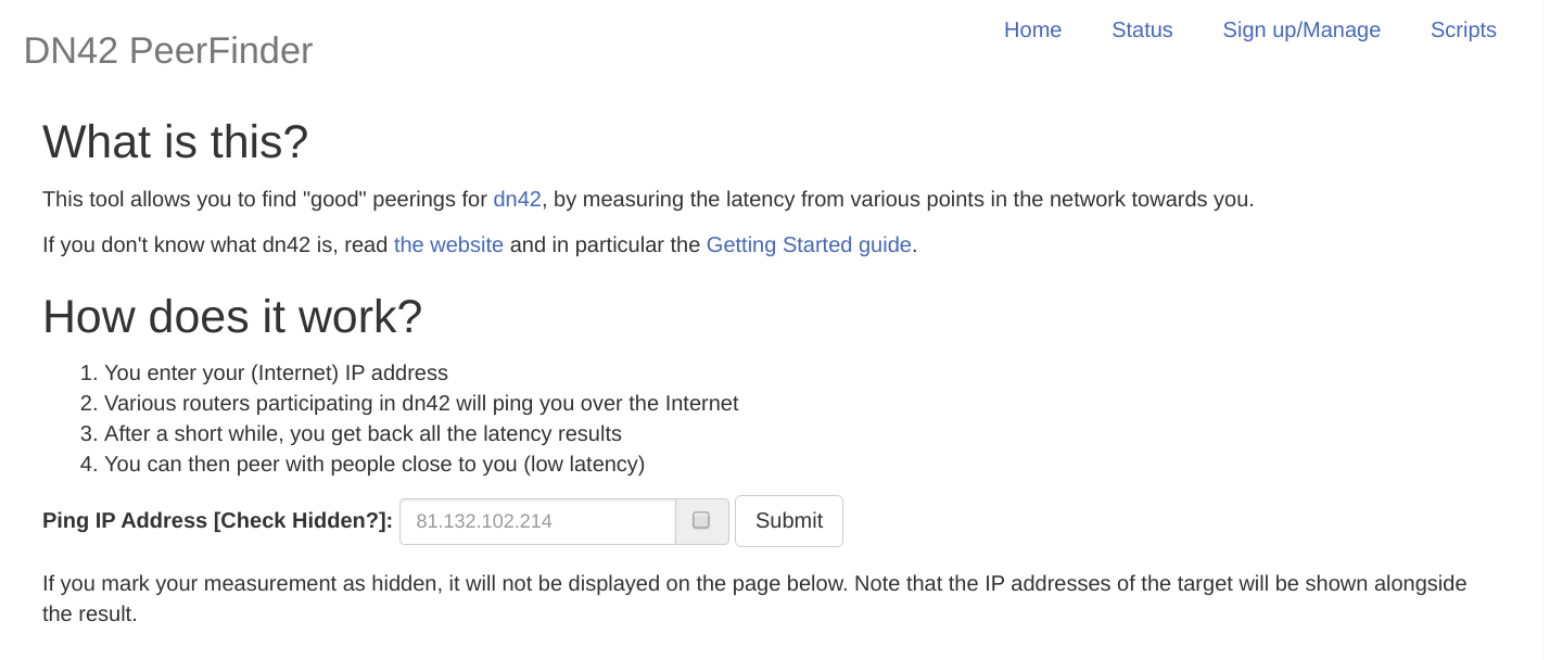
The DN42 PeerFinder, accessible at dn42.us/peers.
OpenVPN is easier to configure as a client (but not as a server), and also has greater monitoring and debugging capabilities. However, Wireguard is much more lightweight and is now included in the latest versions of the Linux Kernel. In this article we will use OpenVPN, however you can safely use Wireguard as an alternative if you'd prefer.
Below I've linked a few of the reputable peers that I found when I first joined DN42:
- dn42-svc.weiti.org - Wireguard
- graffen.dk/dn42.html - Wireguard
- dn42.g-load.eu/peering - OpenVPN, Wireguard
My personal favourite is the Kioubit Network. I'm currently peering with their Lithuania node, and overall I've found the service to be very stable and reliable.
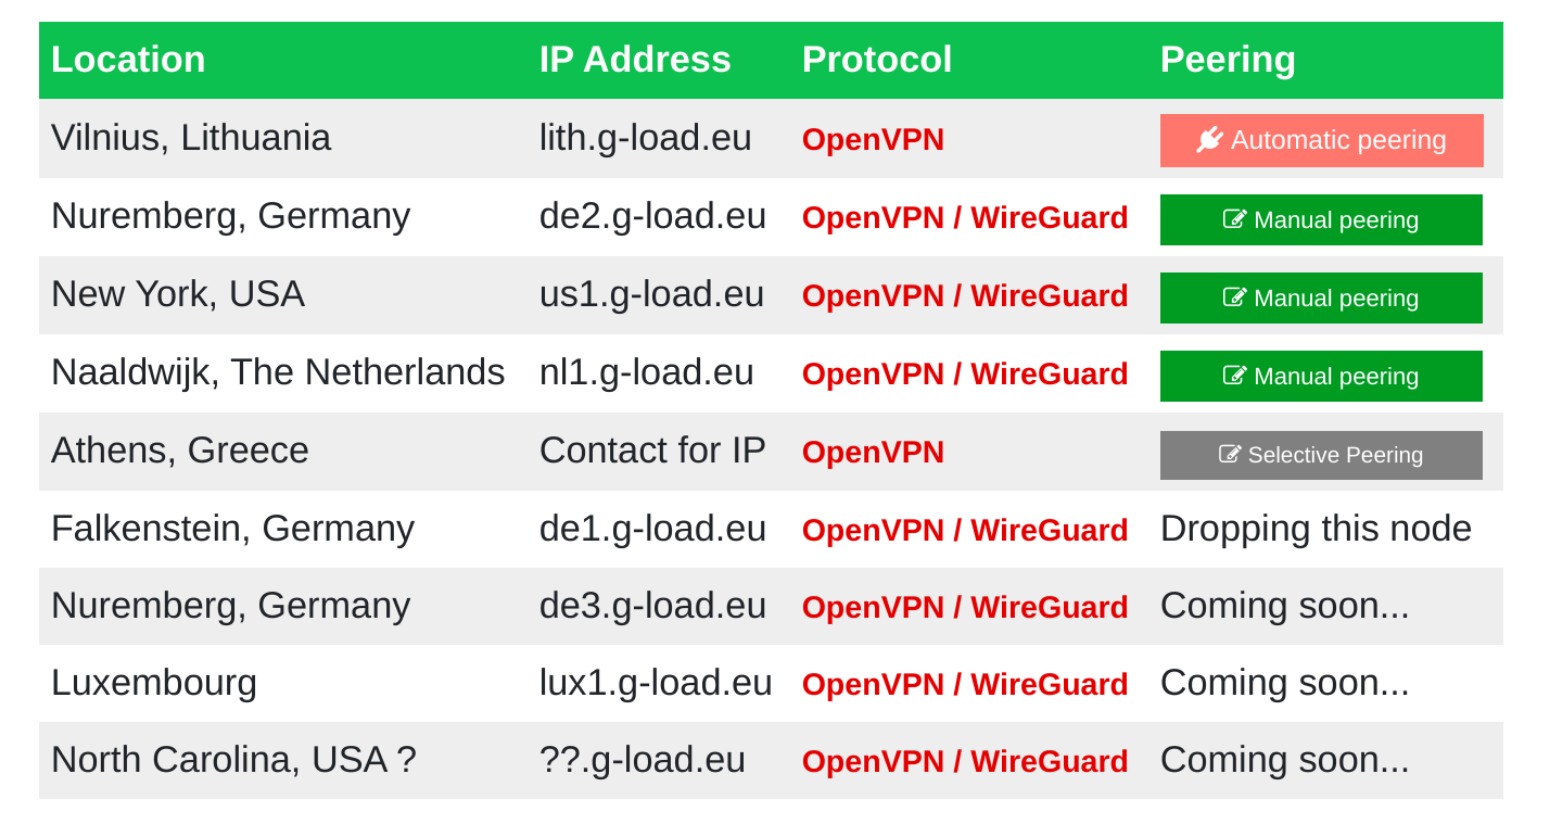
The wide range of peering locations available on the Kioubit Network peering page, accessible at dn42.g-load.eu/peering.
If you want to use Kioubit's automatic peering, you can sign up online to receive your OpenVPN client configuration and private key. Note that inactive peerings with Kioubit are removed after one week, so make sure to keep your session active 24/7 if possible.
Alternatively, if you'd like to peer with someone else, fill out the relevant sign-up forms or contact them to get set up.
Connecting to Your Peer Using OpenVPN
If you opt to connect to your peering partner using OpenVPN, you'll most likely be provided with an OpenVPN client configuration file with the .ovpn file extension, as well as a private key for the connection.
The setup varies depending on your peer, however the following rough steps should provide enough guidance to get the VPN tunnel connected.
Begin by installing OpenVPN:
$ sudo apt install openvpn
Next, put your OpenVPN client configuration file somewhere safe, such as in your home directory. Make sure not to accidentally put it in your local copy of the DN42 registry, as this file shouldn't be shared publicly.
If your OpenVPN key was provided as a separate file, put this somewhere private. Often this should go in the /etc/openvpn directory, however check your client configuration first, as sometimes a different directory is used.
Ensure that the permissions on the file containing your key are appropriately locked down, i.e. by removing all access for all but your own user:
$ chmod go-rwx yourkey.key
You can then bring the tunnel online:
$ sudo openvpn --config yourconfig.ovpn
If you don't see any output, then this generally means that the connection was made successfully.
You can double-check this by viewing the network interface information with the ifconfig command, and then pinging remote tunnel endpoint address of your peering partner, which will usually be a private IPv4 address in the 10.0.0.0/8, 172.16.0.0/12 or 192.168.0.0/16 range.
If you don't seem to have a connection, keep pinging it for a while, as it can often take quite a few packets for the connection to become active. Alternatively, try restarting or stopping and starting the OpenVPN service:
$ sudo service openvpn restart/stop/start
Dnsmasq DNS Setup for '.dn42' Domains
DN42 has its own root DNS servers that are responsible for resolving .dn42 domain names, as well as providing reverse DNS for the DN42 IP address ranges.
The main DN42 DNS resolver can be accessed via 172.20.0.53 or fd42:d42:d42:54::1. Both of these addresses are anycasted, meaning that the same IP address routes to multiple distinct geographical locations. This is very similar to how public resolvers on the internet work, such as 1.1.1.1 or 8.8.8.8.
On DN42, any member can run their own authoritative DNS server and apply to become a part of the root DNS infrastructure. This does bring with it the risk of malicious DNS resolvers, however in most lab environments, this isn't usually a concern. If this is a concern for you, then you should look into using a known trusted resolver, such as one provided by your peering partner or another reputable member of DN42.
You can configure your local system to direct lookups for DN42 resources to the DN42 authoritative DNS servers using a custom Dnsmasq resolver configuration. The configuration described below will work on most Debian or Ubuntu-based systems, however should also be applicable to other Linux distributions with some minor modifications.
Begin by installing Dnsmasq:
$ sudo apt install dnsmasq
Next, create a new config file at /etc/dnsmasq.d/dn42.conf and add the following to it:
no-resolv
server=1.1.1.1
server=/dn42/172.20.0.53
server=/20.172.in-addr.arpa/172.20.0.53
server=/21.172.in-addr.arpa/172.20.0.53
server=/22.172.in-addr.arpa/172.20.0.53
server=/23.172.in-addr.arpa/172.20.0.53
server=/d.f.ip6.arpa/fd42:d42:d42:54::1
The no-resolv configuration is used to prevent Dnsmasq from using the /etc/resolv.conf file to identify the recursive/upstream resolver to use, as this is instead specified directly in the Dnsmasq configuration. I've used 1.1.1.1 in the example above, however you can change this to something else if you wish.
The rest of the configuration is used to specify the resolver to use for .dn42 domains, as well as reverse DNS (*.in-addr.arpa and *.ip6.arpa).
In order to begin using Dnsmasq, you'll first need to disable your existing local resolver, which in the case of most Debian-based systems, can be done using the following (note that this will temporarily kill local DNS resolution):
$ sudo service systemd-resolved stop
Next, edit your /etc/resolv.conf file and ensure that the following configuration is set:
nameserver 127.0.0.53
This will ensure that all local DNS lookups use Dnsmasq.
Usually it isn't recommended to edit the /etc/resolv.conf file, as it is managed automatically by systemd-resolved. However, now that this service has been disabled, you can safely edit the file.
You can then start Dnsmasq:
$ sudo service dnsmasq start
Your new local resolver should now be working. You won't be able to resolve DN42 names yet, but normal internet names should be working:
$ dig +short ldn01.jamieweb.net
139.162.222.67
Once you've confirmed that Dnsmasq is working, you can set it to be your default resolver at boot using the following two commands:
$ sudo systemctl disable systemd-resolved
$ sudo systemctl enable dnsmasq
Once you're announcing your IP address ranges and are able to communicate with DN42 fully, you'll be able to properly look up names such as wiki.dn42 and ca.dn42.
Part 1 / Conclusion
You've now successfully connected to DN42, meaning that you have a suitable lab environment to begin BGP peering with.
In the next article, we'll look at Quagga BGPd, and set up a basic IPv4 and IPv6 BGP configuration.