Registering a Namecoin .bit Domain
Tuesday 16th January 2018
This blog post will cover everything you need to know in order to register a Namecoin .bit domain name on a Debian-based Linux system using the command line.
Skip to Section:
Registering a Namecoin .bit Domain
┣━━ Introduction
┣━━ Installing Namecoin Core
┣━━ Configuring Namecoin Core
┣━━ Buying Namecoin
┣━━ Registering A .bit Domain Name
┣━━ Configuring A .bit Domain Name
┣━━ Local DNS Resolver Setup (ncdns)
┣━━ TLS (HTTPS) Certificate Generation
┣━━ Apache Web Server TLS Configuration
┣━━ Apache Web Server Virtual Host Configuration
┣━━ Problems With Namecoin
┗━━ Conclusion
Introduction
Namecoin is a decentralized domain name system and currency heavily based on Bitcoin.
It allows users to anonymously register and manage domain names with the .bit extension, entirely within the Namecoin blockchain. There is no need for DNS servers or registrars.
Namecoin was the first altcoin, created in April 2011 and is still running successfully today with a recent average value of $7.
I have registered and set up a Namecoin .bit domain name for JamieWeb.

Browsing to jamieweb.bit in Chromium on Xubuntu. Note that in this case, a Chromium "Not secure" warning is shown since the certificate is not signed by a trusted CA - the Namecoin blockchain takes this role instead. The reason the error is showing is because the local Namecoin DNS resolver (ncdns) certificate injection feature does not yet work on Linux systems (at the time of writing this).
There are uses for Namecoin other than .bit domain registrations, including personal IDs. This post focuses on the .bit domain names, however the process for the other Namecoin namespaces is very similar.
Installing Namecoin Core
It is recommended to create a separate, non-privileged user account to run Namecoin Core as. Do not run Namecoin Core as root.
$ sudo adduser --disabled-password namecoin
$ sudo su namecoin
Namecoin Core can be downloaded from either Namecoin.org or the namecoin-core GitHub repository.
You can use a pre-packaged release or build Namecoin Core from source. Pre-packaged releases are verified using Gitian signatures, available in the Namecoin gitian.sigs GitHub repository.
Installing a Pre-packaged Build:
Download the latest pre-packaged build from the Namecoin website, as well as the Gitian signatures and their signature from GitHub. For example:
$ wget https://namecoin.org/files/namecoin-core-0.13.99-name-tab-beta1-notreproduced/namecoin-0.13.99-x86_64-linux-gnu.tar.gz

$ wget https://github.com/namecoin/gitian.sigs/raw/master/0.13.99-name-tab-beta1-linux/JeremyRand/namecoin-linux-0.13-build.assert.sig

$ wget https://github.com/namecoin/gitian.sigs/raw/master/0.13.99-name-tab-beta1-linux/JeremyRand/namecoin-linux-0.13-build.assert
Note: At the time of writing this, Namecoin Core 0.15.99 was released just 3 days ago. It appears that packaged versions of this are not yet available for public download, however you can still build it from source.
In order to verify your download, acquire the PGP key of a trusted developer who has produced Gitian signatures for the release that you are using. I used Jeremy Rand's key with fingerprint 5174 0B7C 732D 572A 3140 4010 6605 55E1 F8F7 BF85:
$ gpg --recv-keys 51740B7C732D572A31404010660555E1F8F7BF85
You can then double-check the key ID:
$ gpg --keyid-format LONG -k
Once you have successfully acquired and verified the key, verify the Gitian signatures:
$ gpg --verify namecoin-linux-0.13-build.assert.sig namecoin-linux-0.13-build.assert
gpg: Signature made Sat 15 Oct 2016 08:13:13 PM UTC using RSA key ID 786D6570
gpg: Good signature from "Jeremy Rand (Master Key) <[Email Redacted]>"
gpg:                 aka "Jeremy Rand <[Email Redacted]>"
gpg:                 aka "Jeremy Rand <[Email Redacted]>"
gpg:                 aka "Jeremy Rand <[Email Redacted]>"
gpg:                 aka "Jeremy Rand <[Email Redacted]>"
gpg: WARNING: This key is not certified with a trusted signature!
gpg:          There is no indication that the signature belongs to the owner.
Primary key fingerprint: 5174 0B7C 732D 572A 3140  4010 6605 55E1 F8F7 BF85
     Subkey fingerprint: 541D DF77 302B 6847 2806  D912 B3F2 D165 786D 6570
If verification is successful, you can then verify the Namecoin Core package that you downloaded. For example:
$ grep `sha256sum namecoin-0.13.99-x86_64-linux-gnu.tar.gz` verifications/namecoin-linux-0.13-build.assert
verifications/namecoin-linux-0.13-build.assert:    294b1106001d6ea2b9d9ee6a655021ef207a24e8f1dec8efd5899728b3849129  namecoin-0.13.99-x86_64-linux-gnu.tar.gz
If you get a match for the file that you downloaded, verification has succeeded and you can proceed with installation.
Extract the downloaded file:
tar -xf namecoin-0.13.99-x86_64-linux-gnu.tar.gz
In the resulting folder, the main things that you will need are in the bin/ directory.
Configuring Namecoin Core
Before you run Namecoin Core for the first time, you should create the .namecoin directory and the namecoin.conf file:
$ mkdir ~/.namecoin
$ nano ~/.namecoin/namecoin.conf
Add your desired RPC port to the config file, the default is 8336 which should be fine in most configurations.
rpcport=8336
If you are only going to be accessing your node over RPC locally, you do not need to specify rpcuser or rpcpass, as cookie authentication will be used.
An authentication cookie is automatically generated at ~/.namecoin/.cookie every time Namecoin Core runs. This can be used by other applications such as namecoin-cli and ncdns in order to communicate with your node locally. You can specify a custom path for your cookie file with the rpccookiefile option. Your cookie file must be kept private as it can give people full control of your node including access to the wallet.
You can also optionally prune your node in order to reduce storage space requirements at the expense of been a fully validating node. The minimum prune amount is 550 MB. The Namecoin blockchain is currently around 5.5 GB in size. Pruning is not recommended as this limits how much your node helps the network.
prune=550
You are now ready to run Namecoin Core. Navigate to the bin/ directory of your Namecoin Core installation and run namecoind as a daemon:
$ ./namecoind -daemon
Since this is the first time you are running Namecoin Core, it will download and validate the blockchain from other nodes. Depending on your internet connection speed and processing power, this could take several days. For me it took around 13 hours start to finish.
In order to interact with your node once it is running, you can use namecoin-cli.
To check the status of the sync, use the following:
$ ./namecoin-cli getblockchaininfo
The important values are "blocks", "headers" and "verificationprogress".
Once the initial sync is complete, the "blocks" value should be equal to "headers", and "verificationprogress" should be almost 1, for example 0.9999894447990749:
$ ./namecoin-cli getblockchaininfo | head
{
  "chain": "main",
  "blocks": 379879,
  "headers": 379879,
  "bestblockhash": "b98949ddc4eda730bebbdf81498fc7ff8b8e52c5a8dc06f12facdc9d8f24aaab",
  "difficulty": 1736887010709.641,
  "mediantime": 1515884469,
  "verificationprogress": 0.9999894447990749,
  "chainwork": "0000000000000000000000000000000000000000009092eb1069a6d651f18ac8",
  "pruned": true,
While your node is synchronizing, you can still use the wallet functionality. This is a good time to encrypt your wallet.
In order to avoid sending your desired wallet passphrase as a bash command, you can use the namecoin-cli -stdin (standard input) argument. This allows you to pass extra arguments to namecoin-cli using stdin, one argument per line. Not using this could result in your password appearing in logs such as .bash_history.
Execute the following command, then enter your desired password in double quotes ("). Press Ctrl+D twice in order to close stdin:
$ ./namecoin-cli -stdin encryptwallet
"desired-passphrase"
Now that your wallet is encrypted, any operations which require access to the private keys will not be possible until you unlock your wallet. In order to temporarily unlock your wallet, use the following command. The numeric value is the desired number of seconds to unlock your wallet for. If you specify "60", then your wallet passphrase will be stored in memory for 60 seconds. Set this value to as low as possible in order to protect your wallet.
$ ./namecoin-cli -stdin walletpassphrase
"passphrase"
60
Use Ctrl+D twice again in order to close stdin. Now your wallet will be unlocked for 60 seconds, meaning that you have 1 minute to perform any actions which require access to your private keys. After this time expires, you'll have to unlock your wallet with your passphrase again in order to use your private keys.
I also highly recommend taking a backup of your wallet at this stage, as losing your wallet would mean losing access to all of the names that you have registered with it, as well as any Namecoin contained within it.
Buying Namecoin
Believe it or not, one of the hardest parts of this process was actually acquiring some Namecoin! It was temporarily unavailable for several days at my usual go-to place for cryptocurrency to cryptocurrency trading (shapeshift.io), so I had to find somewhere else.
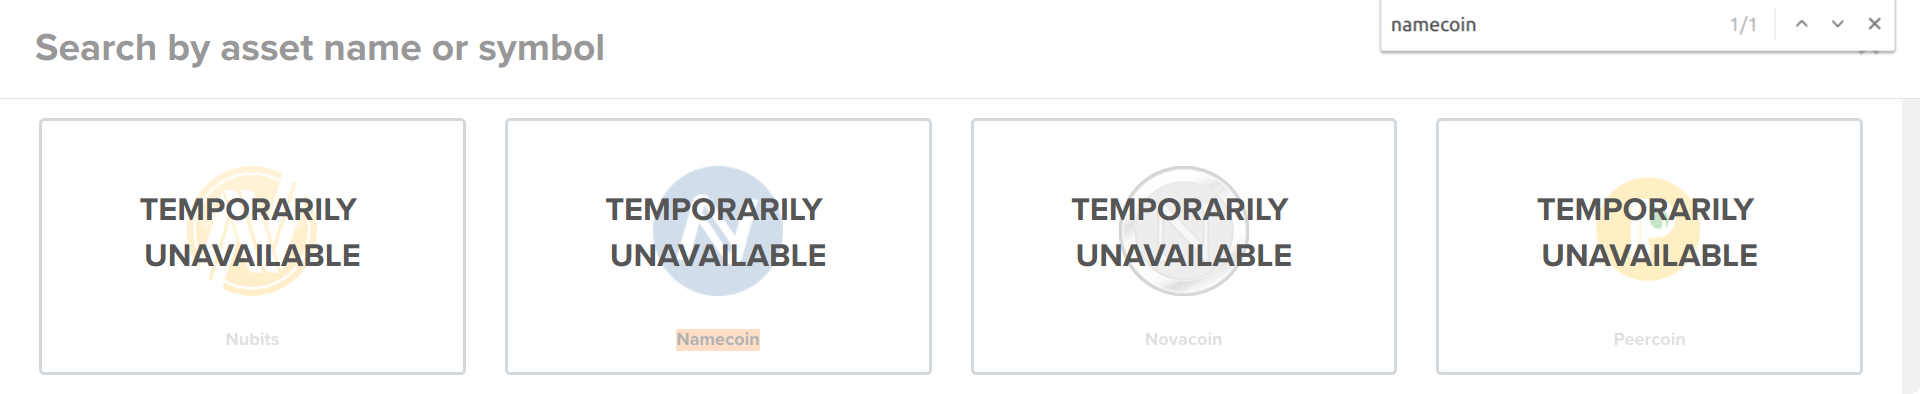
I wanted to find somewhere where I could exchange it directly for another cryptocurrency, rather than going through the ID verification process for a fiat to crypto exchange.
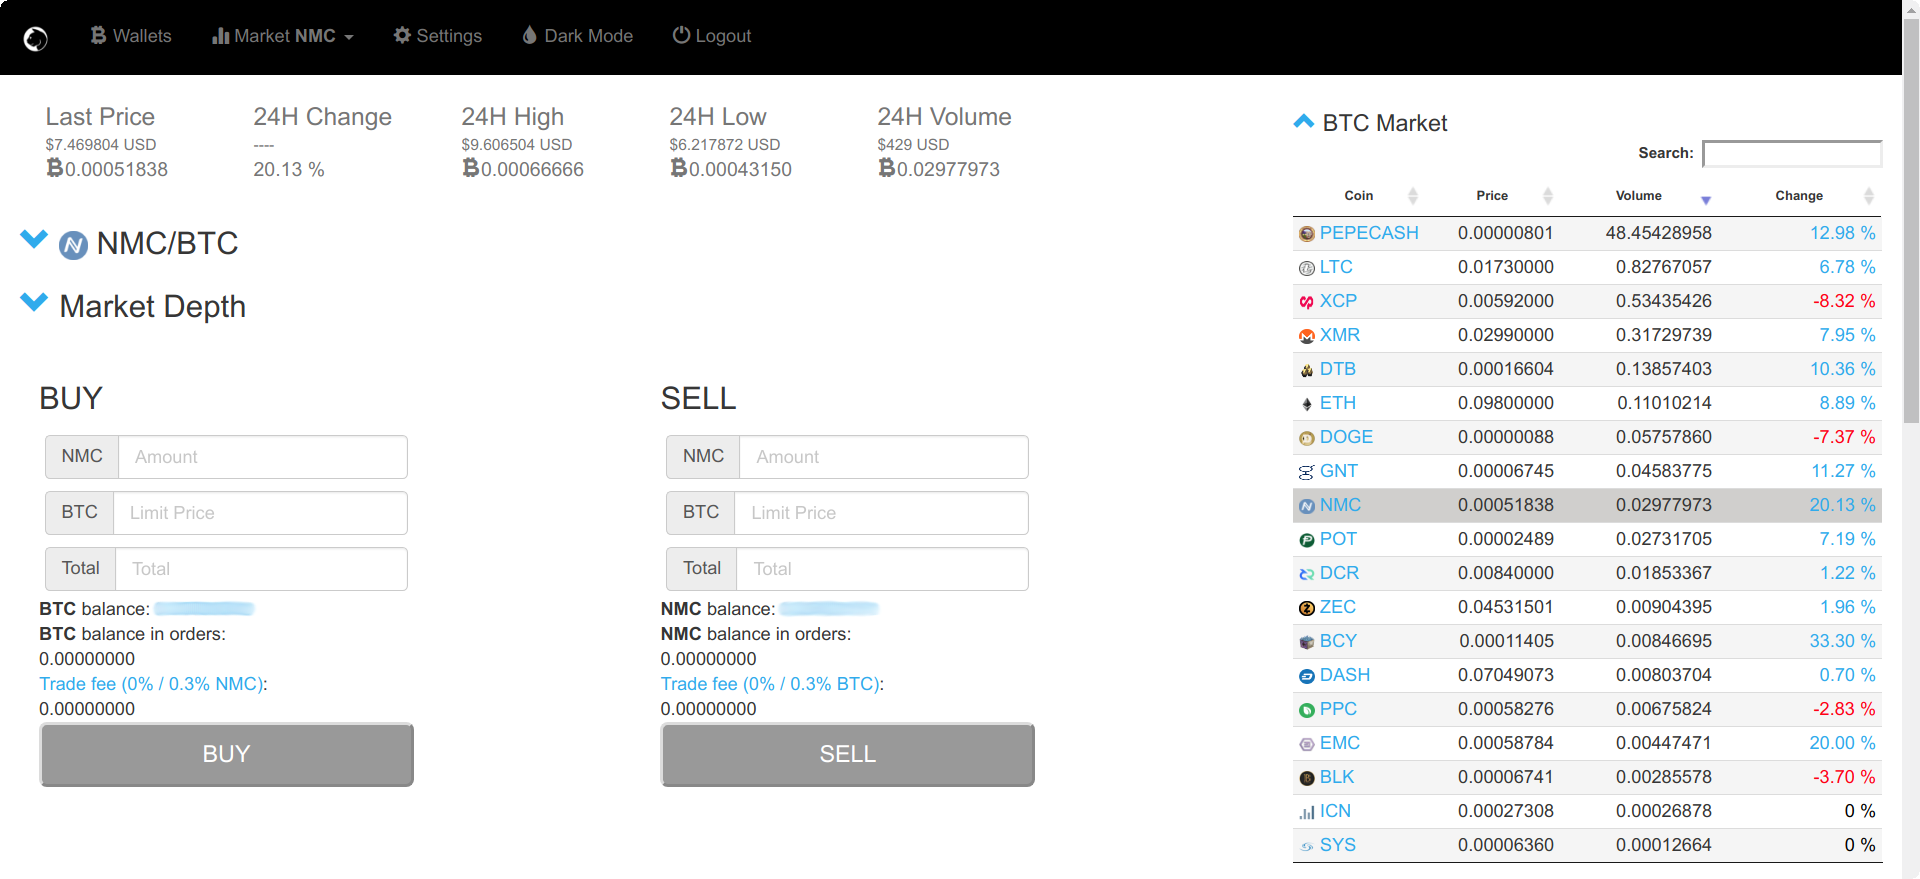
After some looking around, I came across TuxExchange, which is what finally allowed me to buy some Namecoin!
I sent Litecoin to TuxExchange, where I then exchanged it for Bitcoin, and then exchanged that Bitcoin into Namecoin, and withdrew to my Namecoin wallet.
The reason I sent Litecoin to TuxExchange rather than Bitcoin directly is because Litecoin is faster and cheaper to send at the moment due to the Bitcoin scaling issues.
It is important to note that on TuxExchange, it doesn't seem to be possible to exchange altcoins for other altcoins, everything has to go through Bitcoin.
The withdrawal fee for Namecoin was also extortionate. I wanted to withdraw 1 Namecoin, but the fee was 1 Namecoin! I know that I got ripped-off a bit there, but I had been looking for somewhere to buy Namecoin for long enough and just had to go through with it.
Note: I am in no way endorsing ShapeShift or TuxExchange, I am just using them as examples that worked for me. Please do your own research before spending money on an exchange. I am not responsible for any losses.
At the time of writing this, 1 Namecoin is worth around $7.
In order to get a wallet address to send your Namecoin to, use the following command:
$ ./namecoin-cli getnewaddress
After sending your transaction, wait for it to confirm, then check your balance with:
$ ./namecoin-cli getbalance
Registering A .bit Domain Name
Registering a Namecoin .bit domain name costs very little. The registration fee is 0.01 Namecoin, as well as the transaction fees for two further transactions to configure your name. I have registered and set up 4 names, and that has cost me just over 0.05 Namecoin in total, which is currently around $0.35.
In order to register a .bit domain name, first check whether it is available:
$ ./namecoin-cli name_show d/your-name-here
"your name here" is your desired name without the ".bit". For example in order to check my name:
$ ./namecoin-cli name_show d/jamieweb
If a name is taken, you will see something like the following:
{
  "name": "d/jamieweb",
  "value": "{\"ip\":\"139.162.222.67\", \"ip6\":\"2a01:7e00:e001:c500::1\", \"map\": {\"*\": {\"ip\":\"139.162.222.67\", \"ip6\":\"2a01:7e00:e001:c500::1\"}}}",
  "txid": "e4898012ba072996fa180063fcb67f13b7f8b49be7a7ab41b9f12f451fbb2066",
  "vout": 1,
  "address": "NEbYT3nB84nMtZCQyR6T6axpNpjxMkrzfV",
  "height": 379847,
  "expires_in": 35957,
  "expired": false
}
If your desired name is taken, the best you can do is wait until it expires and hope that the owner doesn't renew it.
If your desired name is available, you will see the following:
error code: -4
error message:
name not found: 'd/your-name-here'
In order to register your .bit domain name, you must first reserve it. Issue the following command, substituting "your-name-here" for your desired name (without the .bit):
$ ./namecoin-cli name_new d/your-name-here
If successful, two hex numbers will be returned, one long and one slightly shorter. Take a secure note of these numbers as you will need them later.
Now you must wait for at least 1 confirmation before you are able to configure your name. After you configure your name, the configuration will not be applied for a further 12 blocks (around 2 hours on average).
The name configuration command consists of your domain name, the short and long hex numbers and a configuration value. This configuration value can be anything you want, however if you want your domain name to resolve to an IP address, you need to use a JSON-encoded string containing DNS-like records for your domain.
Below I have used an example configuration in order to map every host in the domain to one IPv4 and IPv6 address, however I will go into more detail in the next section.
Make sure to change the JSON-encoded part to contain your own IP addresses. The example below contains mine! Note that if you are using -stdin, you should not enclose your JSON in quotes as this will cause your JSON string to be invalid, however if you are passing the arguments to namecoin-cli directly, you must enclose your JSON in single quotes (').
In order to validate your JSON, use Python's JSON tool. Paste in your JSON followed by Ctrl+D twice and Python will test it:
$ python -m json.tool
{"ip":"139.162.222.67", "ip6":"2a01:7e00:e001:c500::1", "map": {"*": {"ip":"139.162.222.67", "ip6":"2a01:7e00:e001:c500::1"}}}{
    "ip": "139.162.222.67",
    "ip6": "2a01:7e00:e001:c500::1",
    "map": {
        "*": {
            "ip": "139.162.222.67",
            "ip6": "2a01:7e00:e001:c500::1"
        }
    }
}
You can use the namecoin-cli -stdin argument again in order to pass your arguments more privately.
$ ./namecoin-cli -stdin name_firstupdate
Then enter the name you reserved, followed by the short hex number on a new line (press enter/return), the long hex number on a new line, then finally the domain value.
For example:
$ ./namecoin-cli -stdin name_firstupdate
d/your-name-here
f572d396fae9206628714fb2ce00f72e94f2258f
5891b5b522d5df086d0ff0b110fbd9d21bb4fc7163af34d08286a2e846f6be03
{"ip":"139.162.222.67", "ip6":"2a01:7e00:e001:c500::1", "map": {"*": {"ip":"139.162.222.67", "ip6":"2a01:7e00:e001:c500::1"}}}
...and then issue Ctrl+D twice in order to close stdin. If successful, a 64 character hex string should appear.
Now wait for 12 blocks to pass. You can check the status of your registration using name_show:
$ ./namecoin-cli name_show d/your-name-here
Once your name has been registered and configured, you will be able to see your configuration value in the output to name_show. If the output to name_show is as expected, then you now successfully own the .bit domain name for the next 36,000 blocks, which is around 6 months.
Make sure to renew your domain name before it expires, otherwise somebody else will be able to take it from you.
Configuring a .bit Domain
The domain configuration value can be used to store up to 520 bytes of data. This can be anything, it doesn't have to be JSON-encoded DNS-like information, however without this your domain will not really be usable.
There are various different records you can specify in your JSON-encoded configuration value, including the standard DNS "A", "AAAA", "CNAME", etc records, as well as Namecoin-specific records such as "tor", "i2p" and direct IP address mapping with "ip" and "ip6" records.
There is also a "tls" record, which closely resembles DANE, allowing you to specify the fingerprints of the TLS certificates used on a particular domain.
You can also delegate control of your domain to standard nameservers using "ns" records, however this is only recommended if you are using DNSSEC.
For full information on the various domain configuration values, there is a very useful reference table on the Namecoin Wiki, however this is outdated. For the latest standards, see the Namecoin proposals repository. At the time of writing this, ifa-0001 contains information on normal DNS record types, and ifa-0002 contains information on non-standard/Namecoin-specific DNS record types.
In order to update the configuration value for your domain, you can use the name_update command, rather than name_firstupdate. For example:
$ ./namecoin-cli name_update d/jamieweb '{"ip":"139.162.222.67", "ip6":"2a01:7e00:e001:c500::1", "map": {"*": {"ip":"139.162.222.67", "ip6":"2a01:7e00:e001:c500::1"}}}'
If you are passing the value to namecoin-cli directly, you must enclose your JSON string with single quotes ('). If you are using the namecoin-cli -stdin argument, single quotes should not be used as this will cause the JSON string to be invalid.
Local DNS Resolver Setup (ncdns)
ncdns is a local DNS server that can directly query the Namecoin blockchain, allowing you to locally resolve .bit domains. ncnds is also used to generate TLS certificates for .bit domains.
You can download ncdns from the GitHub repository.
As with Namecoin Core, it is recommended to create a separate user to run ncdns as. This will also help to protect your Namecoin wallet.
Once you have installed ncdns, you'll need to set up a configuration file for it. You can copy a sample configuration file from doc/ncdns.conf.example to either /etc/ncdns/ncdns.conf or ../etc/ncdns.conf (relative to the main ncdns execution directory).
$ sudo mkdir /etc/ncdns
$ sudo cp doc/ncdns.conf.example /etc/ncdns/ncdns.conf
Once you have copied the file, edit it and set up a local address and port to bind to. I used port 1025, as this allows me to run ncdns as a non-root user and avoids taking up more valuable ports.
You also need to specify the location of the cookie file. Place the following below the namecoinrpcaddress variable:
namecoinrpccookiepath="/path/to/authentication/cookie"
You may need to adjust the permissions of the .cookie file in order to allow ncdns to read it.
You can then run ncdns. I recommend using screen or another terminal session in order to run ncdns, as it does not run in the background by default. The command below will start a detached screen session with ncdns running inside it. To resume the screen session, use "screen -r":
$ screen -dmS ncdns ./ncdns
Then check that ncdns is working using dig. Keep in mind that if your new .bit domain has not yet been properly configured, ncdns will not return anything for it:
$ dig @127.0.0.1 -p 1025 jamieweb.bit

; <<>> DiG 9.10.3-P4-Ubuntu <<>> @127.0.0.1 -p 1025 jamieweb.bit
; (1 server found)
;; global options: +cmd
;; Got answer:
;; ->>HEADER<<- opcode: QUERY, status: NOERROR, id: 26578
;; flags: qr aa rd; QUERY: 1, ANSWER: 1, AUTHORITY: 0, ADDITIONAL: 1
;; WARNING: recursion requested but not available

;; OPT PSEUDOSECTION:
; EDNS: version: 0, flags:; udp: 4096
;; QUESTION SECTION:
;jamieweb.bit.			IN	A

;; ANSWER SECTION:
jamieweb.bit.		600	IN	A	139.162.222.67

;; Query time: 0 msec
;; SERVER: 127.0.0.1#1025(127.0.0.1)
;; WHEN: Sat Jan 13 20:02:28 UTC 2018
;; MSG SIZE  rcvd: 57
As you can see in the answer section above, the IPv4 address for jamieweb.bit was resolved successfully. In order to check other DNS records and domains, you can use the usual dig syntax:
$ dig +short @127.0.0.1 -p 1025 jamieweb.bit A www.jamieweb.bit A jamieweb.bit AAAA www.jamieweb.bit AAAA
139.162.222.67
139.162.222.67
2a01:7e00:e001:c500::1
2a01:7e00:e001:c500::1
Now that your local ncdns resolver is working, your system needs to be configured to delegate .bit resolutions to the local ncdns server. You can do this by installing Unbound and dnssec-trigger.
Note that this will change your standard DNS resolution configuration, so be careful before proceeding:
$ sudo apt-get install dnssec-trigger
Now you need to create an Unbound configuration file to delegate .bit resolutions to ncdns:
$ sudo nano /etc/unbound/unbound.conf.d/bit.conf
...and add the following, editing the values for your own configuration if necessary:
server:
  do-not-query-localhost: no
stub-zone:
  name: bit.
  stub-addr: 127.0.0.1@1025
server:
  domain-insecure: bit.
If you wish to use DNSSEC, remove the bottom two lines from the above configuration, and see the DNSSEC section of the ncdns README for more information.
Once you are done with configuration, reload Unbound:
$ sudo service unbound reload
Now make sure that both Namecoin Core and ncdns are running, and check your .bit DNS resolution again with dig, this time not specifying a particular server:
$ dig +short jamieweb.bit A www.jamieweb.bit A jamieweb.bit AAAA www.jamieweb.bit AAAA139.162.222.67
139.162.222.67
2a01:7e00:e001:c500::1
2a01:7e00:e001:c500::1
As you can see, your default DNS server is now resolving .bit domains as well as normal ICANN domains:
$ dig +short jamieweb.bit A jamieweb.bit AAAA jamieweb.net A jamieweb.net AAAA
139.162.222.67
2a01:7e00:e001:c500::1
139.162.222.67
2a01:7e00:e001:c500::1
...and if you browse to a .bit domain, you will be able to view the page content successfully!
curl jamieweb.bit
<!DOCTYPE HTML PUBLIC "-//IETF//DTD HTML 2.0//EN">
<html><head>
<title>301 Moved Permanently</title>
</head><body>
<h1>Moved Permanently</h1>
<p>The document has moved <a href="https://jamieweb.bit/">here</a>.</p>
</body></html>
As you can see, the .bit domain was successfully resolved and the page content requested and returned (in this case, a 301 redirect to the HTTPS version of the root domain so that browsers will pick up the HSTS policy).
TLS (HTTPS) Certificate Generation
TLS certificates for .bit domains are generated and self-signed by a tool that comes with ncdns, and can then be installed on a web server like a normal CA-signed certificate. Anybody can generate and self-sign certificates for any .bit domain, so you do not necessarily need to generate the certificates on the same machine as the Namecoin wallet that owns your .bit domain name(s).
Wildcard certificates are not supported, so you'll have to generate a separate certificate for each subdomain. In my case, I generated one for www and one for the root domain.
In order to generate a TLS certificate for your .bit domain, use the following command, substituting information where necessary:
./generate_nmc_cert -ecdsa-curve P256 -host your-name-here.bit -start-date "Jan 14 00:00:00 2018" -end-date "Jan 14 00:00:00 2028"
The files cert.pem and key.pem will be output in the directory that you are currently working in. Keep in mind that if you issue multiple certificates, you will actually overwrite the two files, so make sure to move them somewhere safe before issuing another certificate.
Make sure to keep the key.pem file private, as this is the key for your TLS certificate.
In order for your certificates to work properly with ncdns's certificate injection feature and to avoid HTTPS browser warnings, you'll also need to set up tls records in your domain configuration. This follows a standard similar to DANE by specifying allowed certificates in the DNS records for a domain. Please see Setting Up TLS (for name owners) on the Namecoin website.
Apache Web Server TLS Configuration
The default location to store TLS certificates for use with Apache is /etc/ssl. Public certificates should go in /etc/ssl/certs and private keys should go in /etc/ssl/private. You can use other locations if you want, but always make sure that your private key is protected and only accessible by users who require access. You are also free to rename your files in order to better identify them or prevent name clashes with others.
Ideally, your TLS certificate private key should be owned and grouped by root:
$ sudo chown root:root /etc/ssl/private/your-name-here-bit-key.pem
$ sudo chmod o-r /etc/ssl/private/your-name-here-bit-key.pem
Apache will still be able to read it as the process that spawns Apache is owned by root.
Next, make sure that Apache mod_ssl is enabled:
$ sudo a2enmod ssl
$ sudo service apache2 restart
Virtual host configuration for .bit TLS is detailed in the next section, however it is important to make sure that you have a working Apache TLS configuration file before you enable your .bit TLS virtual host, otherwise you may completely break your Apache server.
If you set up a TLS virtual host without a proper TLS configuration file, nobody will be able to connect to your server over TLS, instead they will get the following error:
gnutls_handshake() failed: The TLS connection was non-properly terminated.
...and in your Apache log files, you'll be getting error code \x16\x03\x01:
0.0.0.0 - - [13/Jan/2018:00:00:00 +0000] "\x16\x03\x01\x01\x1a\x01" 400 0 "-" "-"
In order to prevent this, make sure that you have a working TLS configuration file included in your virtual host. For me, I used the /etc/letsencrypt/options-ssl-apache.conf file, however if you do not use Let's Encrypt, then the Apache default-ssl.conf file should be what you need:
$ sudo a2ensite default-ssl.conf
$ sudo service apache2 reload
Apache Web Server Virtual Host Configuration
Configuring an Apache Web server to serve content for your .bit domain is just the same as for any other domain.
The example below shows how to set up your Apache server to serve content at the www subdomain over TLS (HTTPS), with non TLS and the root domain redirecting to HTTPS on www.
The example contains my IP addresses and domain name as sample data, make sure to change these to your own. Also update the file paths to your own:
<VirtualHost 139.162.222.67:80 [2a01:7e00:e001:c500::1]:80>
    ServerName www.jamieweb.bit
    DocumentRoot /path/to/web/files

    ErrorLog ${APACHE_LOG_DIR}/error.log
    CustomLog ${APACHE_LOG_DIR}/access.log combined

    Header always unset Strict-Transport-Security

    RewriteEngine on
    RewriteCond %{SERVER_NAME} =www.jamieweb.bit
    RewriteRule ^ https://jamieweb.bit%{REQUEST_URI} [END,QSA,R=permanent]
</VirtualHost>

<VirtualHost 139.162.222.67:80 [2a01:7e00:e001:c500::1]:80>
    ServerName jamieweb.bit
    DocumentRoot /path/to/web/files

    ErrorLog ${APACHE_LOG_DIR}/error.log
    CustomLog ${APACHE_LOG_DIR}/access.log combined

    Header always unset Strict-Transport-Security

    RewriteEngine on
    RewriteCond %{SERVER_NAME} =jamieweb.bit
    RewriteRule ^ https://jamieweb.bit%{REQUEST_URI} [END,QSA,R=permanent]
</VirtualHost>

<IfModule mod_ssl.c>
<VirtualHost 139.162.222.67:443 [2a01:7e00:e001:c500::1]:443>
    ServerName www.jamieweb.bit
    DocumentRoot /path/to/web/files

    ErrorLog ${APACHE_LOG_DIR}/error.log
    CustomLog ${APACHE_LOG_DIR}/access.log combined

    SSLCertificateFile /path/to/ssl/cert/www-bit.pem
    SSLCertificateKeyFile /path/to/ssl/key/www-bit.pem
    Include /path/to/apache/tls/configuration.conf
</VirtualHost>
</IfModule>

<IfModule mod_ssl.c>
<VirtualHost 139.162.222.67:443 [2a01:7e00:e001:c500::1]:443>
    ServerName jamieweb.bit
    DocumentRoot /path/to/web/files

    ErrorLog ${APACHE_LOG_DIR}/error.log
    CustomLog ${APACHE_LOG_DIR}/access.log combined

    RewriteEngine on
    RewriteCond %{SERVER_NAME} =jamieweb.bit
    RewriteRule ^ https://www.jamieweb.bit%{REQUEST_URI} [END,QSA,R=permanent]

    SSLCertificateFile /path/to/ssl/cert/bit.pem
    SSLCertificateKeyFile /path/to/ssl/key/bit.pem
    Include /path/to/apache/tls/configuration.conf
</VirtualHost>
</IfModule>
Put this file in your Apache sites-available configuration directory, then issue:
$ sudo a2ensite my-bit-domain.conf
$ sudo service apache2 reload
If there are any errors, you can check the log using:
$ sudo systemctl status apache2.service
Problems With Namecoin
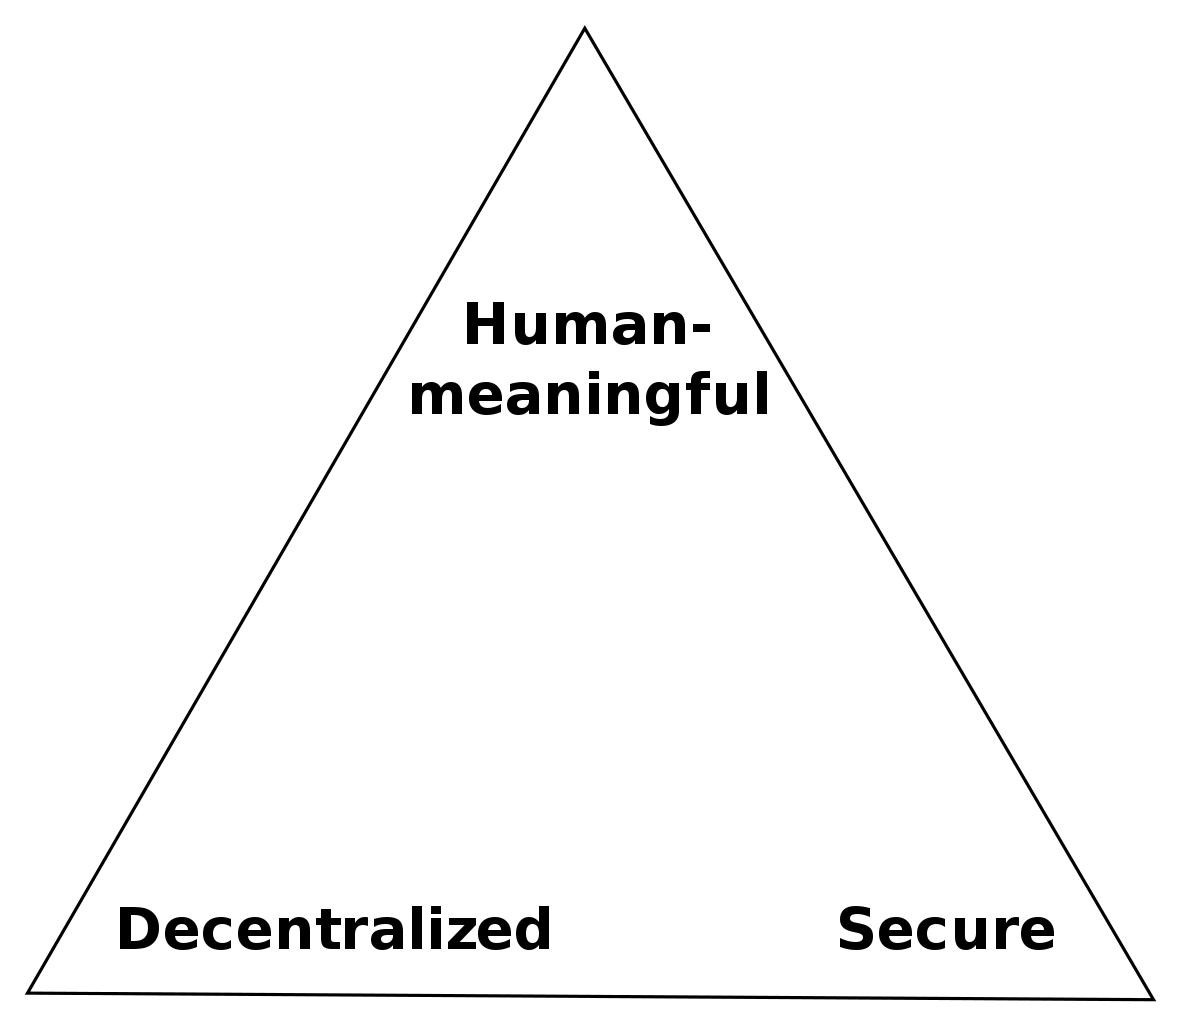
Namecoin provides a good solution to a lot of problems with the current domain name system, and is a method of solving Zooko's Triangle.
From Wikipedia/Zooko's Triangle:
Zooko's triangle defines the three desirable traits of a network protocol identifier as Human-meaningful, Decentralized and Secure.
Namecoin does come with some issues though, especially related to usability and abuse.
Name squatting:
One of the largest issues with Namecoin is name squatting. There are so many names that are registered with seemingly the sole purpose of selling on, rather than to actually use as an identity. Pretty much every short word, name or tech acronym is registered but very few of them are actual websites or anything meaningful, they just contain contact details that can be used to buy the name or are even completely unconfigured.
With more traditional internet domains, there are laws and regulations in place to prevent cybersquatting, and ways to acquire a squatted name if it is causing you harm (such as a trademark violation). I know that Namecoin is specifically designed to prevent this sort of practise where the authorities step in to resolve a dispute, however if somebody is squatting the name that you wanted, there isn't really anything that you can do.
I do not believe that this problem is unsolvable, as the Onion Name System (OnioNS) has a good solution. There is a fantastic talk by Jesse Victors, one of the developers for OnioNS that explains it in detail, however to vaguely summarise: When names are claimed, a proof-of-work is performed, meaning that it is not realistically feasible for one person to claim many names, as this would require a large amount of processing power. Once a name has been claimed, there is always a chance for another user to claim the name by putting up more processing power than the previous owner. This process happens on a periodic cycle (eg 1 week), making it hard for squatters to claim many names, and easy for honest users to keep their name.
Difficulty to access:
It took me quite a bit of fiddling to get ncdns set up and resolving names correctly, and this also requires running a node (or having RPC access to one). This reduces portability, as it would be difficult to set up .bit domain access for a mobile or embedded device. You'd have to run your own DNS server and point your devices to it, which is a less than ideal setup in many situations. There are several solutions such as public Namecoin DNS servers, however these kind of defeat the objective of Namecoin, which is complete decentralization.
Conclusion
Overall it was interesting to set up Namecoin and I will definitely be keeping my jamieweb.bit domain available for access. I don't realistically expect to get any significant legitimate traffic to jamieweb.bit, however it's there if people want to try it or stumble across it in the .bit namespace.
One of the best things is that Namecoin .bit domains are very easy to maintain. Now that I have registered and configured it, it will continue working without a problem even if I stop running Namecoin Core and/or ncdns all together. In that situation, I wouldn't be able to resolve it locally and visit it myself, but it will continue working for other people. The only thing I need to do is keep an eye on the expiration time and make sure to renew it before then.