Introduction to BGP Routing and Security
Part 1: BGP Peering with Quagga
Monday 1st June 2020
This is part 1 of a multi-part series on BGP routing and security:
- Prelude: Connecting to the DN42 Overlay Network
- Part 1: BGP Peering with Quagga (You Are Here)
- Part 2: Preventing Transit
- Part 3: Coming Soon
This article serves as a practical introduction to BGP peering using the Quagga network routing software suite. This will set the groundwork for the security-related elements that will be covered later in the series.
Skip to Section:
Introduction to BGP Routing and Security
Part 1: BGP Peering with Quagga
┣━━ What is Quagga?
┣━━ Why Quagga?
┣━━ Key Terminology
┣━━ Installing Quagga
┣━━ Configuring VTY Access
┣━━ Binding the Source Address to the Loopback Interface
┣━━ Setting the Default Source Address for Routes
┣━━ Configuring BGP (IPv4)
┣━━ Configuring BGP (IPv6)
┣━━ Viewing BGP Peering Session Info and Routes
┗━━ Part 2 / Conclusion
What is Quagga?
Quagga is a network routing software suite providing implementations of various routing protocols, including RIP, OSPF and BGP. It is a fork of the discontinued GNU Zebra project, and utilises a configuration syntax very similar to that of Cisco IOS.
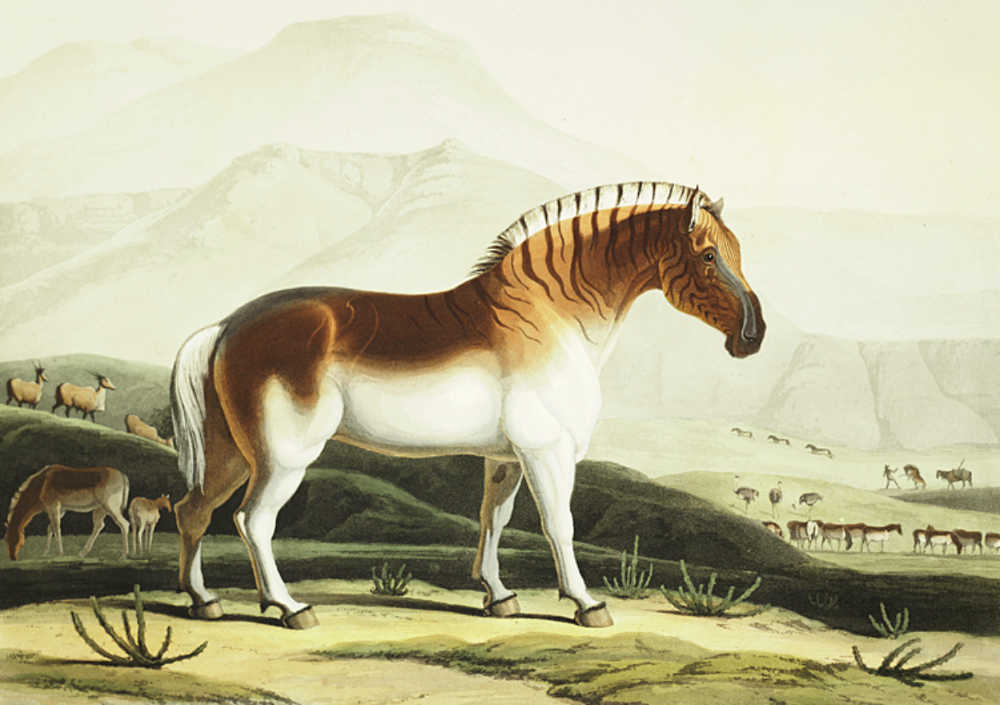
An 1804 illustration by Samuel Daniell of a South African quagga, an extinct subspecies of plains zebra after which the Quagga network routing software suite was named. Source (Public Domain)
Unlike traditional routing daemons which interact directly with the kernel, Quagga operates a central kernel routing manager (known as zebra) which exposes an API to the various Quagga routing daemons. This allows the routing daemons to be enabled, disabled and configured on a 'pick and mix' basis, including the ability to run multiple of the same routing daemon on one machine.
This article and series will be primarily focusing on Quagga BGPd, which is Quagga's BGP routing implementation.
Why Quagga?
Quagga BGPd is a very 'traditional' BGP routing daemon, which lacks many of the more advanced automation/software-defined networking features of the alternatives such as Bird, ExaBGP, or GoBGP.
However, Quagga provides a simple, clean and portable environment to learn about BGP, and many people will already be familiar with the configuration syntax due to it's similarities with Cisco IOS.
In addition, for those running in an Ubuntu environment, the Quagga package is present in the Canonical 'main' repository, so it is kept up to date by the Ubuntu Core Developers. Other BGP daemons are unfortunately in the 'universe' repository, meaning that they only receive community support.
Key Terminology
Before proceeding with the hands-on usage of Quagga, I've documented some of the key terminology that will come in useful later.
Autonomous System (AS)
An autonomous system is a collection of IP address range assignments (prefixes) that are owned by a particular administrative entity, such as a business or individual.
Each registered AS has an assigned autonomous system number (ASN), which uniquely identifies the network on the internet. For example, AS64497 or AS4242420171.
ASNs are assigned by Regional Internet Registries (RIRs) such as RIPE or ARIN. You can identify the AS that you're a part of using the Hurricane Electric BGP toolkit.
AS Path
The AS path (known as AS_PATH) is the set of unique networks that must be traversed in order to reach a particular destination.
The length of the AS path, meaning the number of 'hops' between one network and another, is one of the key metrics used when deciding the preferred route to a particular network.
Prefix
A prefix is an IP address range, referring to the network as a whole rather than any specific host.
For example, 203.0.113.0/24, 192.0.2.0/27 and 172.20.0.0/16 are all network prefixes.
The 'size' of a specific prefix is referred to as the 'prefix length', which is essentially another way of saying subnet mask. A 'long' prefix refers to a more specific network, for example, 172.16.1.0/24 is a longer and more specific prefix than 172.16.0.0/12.
Within BGP, the 'longest' or 'most specific' prefix will always take precedence in routing decisions, no matter the length of the path.
The longest prefix allowed within internet BGP routing tables is generally /24 for IPv4 and /48 for IPv6. This is why it's not possible to announce a /25 IPv4 address range on the internet.
Route
A route describes the path or 'next hop' to access a particular network. For example, the following route says that the 203.0.113.0/24 network can be accessed via the router at address 192.0.2.1 using network interface eth0:
203.0.113.0/24 via 192.0.2.1 dev eth0
A particular system or router will usually have a 'routing table', which is essentially a list of known routes. BGP and other routing protocols are used to update and maintain these routing tables.
The 'default route' refers to the route that is used if there isn't an explicit route in place for the destination network. In other words, this is where traffic is sent if the system doesn't know how to reach the destination directly.
Neighbour / Peer
BGP neighbours, more commonly known as 'peers', are other routers that you connect to in order to exchange routing information. This is usually configured manually within your BGP daemon, and takes place over TCP port 179 by default.
Making your own prefixes available (routable) to the internet is achieved by 'announcing' or 'advertising' them to your peers, which is one of the primary roles of BGP.
In many setups, you will peer with your upstream network provider(s) in order to announce your own routes and receive theirs (usually to gain access to the wider internet). This is known as External BGP (EBGP).
If you operate a more complex network and are exchanging routing information internally (within the same AS), this is known as Internal BGP (IBGP).
The act of maintaining an active connection to a neighbour is known as 'peering', and each occurrence of this is known as a 'session'.
By default, your router must be on the same subnet as your peer(s) and be able to resolve each of them using ARP. This usually means having a physical link, however a VPN connection or tunnel will also suffice. BGP packets have a TTL of 1 by default, so they will be dropped at the network boundary.
It is possible to BGP peer without a direct connection by using manually-configured static routes and 'multi-hop' mode, however this won't be covered in this series as it is a lesser-used feature.
Bogon / Bogon Route
A bogon, also known as a bogon route, is a route that shouldn't be present on the global internet.
For example, erroneous announcements of private IP addresses (such as 192.168.0.0/16), or otherwise reserved address space.
Default-free Zone
The default-free zone (DFZ) is the collection of autonomous systems that are able to route any packet without requiring a default route. In other words, they have visibility over the entire internet.
The DFZ primarily consists of large network providers and internet exchange points (known as IXs or IXPs).
Installing Quagga
This particular guide details the Quagga installation process on Ubuntu Server. The process is very similar for other Linux distributions or BSD-based systems, so it should still be possible to follow along.
Begin by downloading and installing Quagga from the default Ubuntu Apt repositories:
$ sudo apt install quagga-bgpd
This will install the quagga-bgpd and quagga-core packages.
Optionally, if you want to install all of the other routing daemons too, including quagga-ripd and quagga-ospfd, you can just install the quagga metapackage, which includes all of them.
Next, create empty configuration files for Quagga to use:
$ cd /etc/quagga
$ sudo touch bgpd.conf zebra.conf
Finally, start the BGPd service:
$ sudo service bgpd start
This will automatically start the zebra service too, as BGPd is dependent on it. Note that if you ever want to fully stop Quagga, you'll need to stop the zebra service too.
Configuring VTY Access
Once Quagga BGPd has been installed, add yourself to the quaggavty group, which will allow you to access the Quagga command-line interface (known as VTY or Virtual Teletype):
$ sudo adduser user quaggavty
Quagga's command-line interface uses a pager in order to provide a scrollable/paginated interface when an output is too large to fit on the screen (for example when printing a full routing table). By default, the more program is used, however the modern alternative, less, generally provides a better user experience.
If you wish to use less instead of more, which I would recommend, you can add the following environment variable to your ~/.profile or ~/.bash_profile configuration file:
export VTYSH_PAGER="less -FX"
The -F argument is used to prevent less from activating if the output is smaller than one screen in size, and -X is used to prevent the screen being unnecessarily cleared.
Finally, run the vtysh command in order to connect. You should see the welcome text followed by a terminal prompt:
$ vtysh

Hello, this is Quagga (version 1.2.4).
Copyright 1996-2005 Kunihiro Ishiguro, et al.

quagga#
Feel free to have a look around the interface. Most of the commands are either identical or very similar to Cisco IOS.
Commands can also be abbreviated, as long as enough of the command is provided in order to provide an unambiguous match. For example, conf t can be used in place of configure terminal.
You can use quit to exit once done.
Binding the Source Address to the Loopback Interface
In order to properly BGP peer, you need to assign an IP address to your router from one of the prefixes that you're wanting to announce. This is to allow your router to be addressable on the internet, and to allow the correct source address to be set for BGP communications.
For example, if your prefix is 203.0.113.0/24, you may choose to assign the 203.0.113.1 address to your router.
Note that this address is not the one that your BGP peers will use to communicate with you. Instead, an address within the private subnet that you have with your peer(s) will be used, e.g. via a physical link or network tunnel.
If you want to announce multiple prefixes, your router only needs to be assigned an IP address from one of them. If you are operating a dual-stack configuration with both IPv4 and IPv6 prefixes, you should assign one address from each.
In order to test your configuration, you can manually bind the address to your loopback interface:
$ sudo ip addr add 203.0.113.1 dev lo
You can then manually check the route to ensure that it's a local one:
$ ip route get 203.0.113.1
This should return something similar to the following:
local 203.0.113.1 dev lo src 203.0.113.1 uid 1000
The first field is the 'route type', which should be 'local'.
As this address was manually added, the configuration will not persist after the networking services are restarted or the system is rebooted. In order to make the change persistent, you'll need to add a Netplan configuration (as of Ubuntu 17.10, Netplan has replaced the traditional /etc/network/interfaces configuration methodology, and is now the default).
Begin by creating a new Netplan configuration file:
$ sudo nano /etc/netplan/99-quagga-lo.yaml
The add the following configuration, adjusting the values where needed:
network:
  version: 2
  renderer: networkd
  ethernets:
    lo:
      addresses:
        - 203.0.113.1/24
Make sure to specify the correct prefix length. Once done, save and close the file, then test and apply the configuration:
$ sudo netplan try
You can now reboot your system and the address will be automatically added to the loopback interface. You may wish to test this using the ip route get command from earlier in this step.
Setting the Default Source Address for Routes
Next, you need to manually set the source address that Quagga BGPd will use for all of the routes that it will add to your system routing table. This is to ensure that outbound traffic is correctly sent from your router using the address assigned to it from your prefix.
This is achieved using a 'route map', which is a form of conditional statement used to make routing decisions. For example, permitting or denying a particular route based on certain criteria, or applying additional configuration values.
Route maps are comparable to if/else statements, and generally consist of an 'action' (permit or deny a route), as well as 'match' and 'set' clauses. A 'match' clause is used to create a conditional statement which routes are evaluated against (to determine whether they match or not), and a 'set' clause is used to apply specific settings to any routes which match the route map entry.
Begin by opening a VTY session using vtysh, and then enter 'configuration' mode using the configure terminal command, which can be abbreviated as conf t:
quagga# conf t
Your VTY prompt will now display (config) in order to indicate that you're in configuration mode.
Then, create a new route map named RM_SET_SRC:
quagga(config)# route-map RM_SET_SRC permit 10
The permit attribute is the 'action' which is applied to routes which match this route map.
The 10 is the sequence number, which represents the order that route map entries are evaluated, starting from the lowest sequence number. Route maps are evaluated in order until a successful match is found, at which point, by default, the evaluation stops. However, route maps can also be configured to continue evaluation after a successful match.
Currently you only have one route map, so the default sequence number of 10 can be safely used.
You should now be in route map configuration mode, as shown by the (config-route-map) text present in your VTY prompt.
As this route map needs to apply to all routes, you do not need to specify any 'match' clauses, which has the effect of making every single route match.
Proceed by adding a 'set' clause to set the source address for all routes:
quagga(config-route-map)# set src 203.0.113.1
Then configure the route map to apply to all BGP routes:
quagga(config-route-map)# ip protocol bgp route-map RM_SET_SRC
Once you press return on this, Quagga should exit route map configuration mode and return back to the general configuration mode.
Before proceeding to the next step, you may wish to save your configuration so far by writing it to disk:
quagga(config)# exit
quagga# write
Building Configuration...
Configuration saved to /etc/quagga/zebra.conf
Configuration saved to /etc/quagga/bgpd.conf
[OK]
From here, you can optionally print out your route map configuration in order to make sure that it's all correct:
quagga# show route-map RM_SET_SRC
ZEBRA:
route-map RM_SET_SRC, permit, sequence 10
  Match clauses:
  Set clauses:
    src 203.0.113.1
  Call clause:
  Action:
    Exit routemap
BGP:
route-map RM_SET_SRC, permit, sequence 10
  Match clauses:
  Set clauses:
  Call clause:
  Action:
    Exit routemap
Configuring BGP (IPv4)
Now that all of the prerequisite configuration has been completed, it's time to actually configure your BGP neighbours and begin peering.
Start by ensuring that you're in configuration mode, which can be done using conf t if needed.
Next, spawn a BGP protocol process for your AS number:
quagga(config)# router bgp 64497
You're now in BGP configuration mode, so you can enter any relevant BGP commands in order to configure your neighbours and announcements.
Add a neighbour by specifying their locally routable IP address and the AS that they're a part of. Note that the American English spelling of 'neighbour' is used within Quagga BGPd configuration (neighbor):
quagga(config-router)# neighbor 10.0.0.1 remote-as 4242420171
You must also configure the network interface that the neighbour can be reached on:
quagga(config-router)# neighbor 10.0.0.1 interface eth1
This example covers a single-homed BGP setup, where you only have one neighbour/peer. However, if you're wanting to operate a multi-homed setup (with multiple peers), you can continue to add neighbours as required.
Next, you can specify the prefix(es) that you want to announce to your peers:
quagga(config-router)# network 203.0.113.0/24
Finally, set the router ID, which is used to uniquely identify your router among your peers.
By default, Quagga BGPd will select the 'largest' or 'highest' IP address from the available network interfaces and use this as the router ID. This isn't usually the desired behaviour, so you can instead manually set your router ID to match the address assigned to it from your prefix(es).
quagga(config-router)# router-id 203.0.113.1
This completes your initial IPv4 BGP configuration. You can exit configuration mode and write the configuration to disk:
quagga(config)# exit
quagga# write
Building Configuration...
Configuration saved to /etc/quagga/zebra.conf
Configuration saved to /etc/quagga/bgpd.conf
[OK]
Configuring BGP (IPv6)
If you're also wanting to peer over IPv6 and announce IPv6 prefixes, you can configure an IPv6 session.
As with your IPv4 configuration, you'll need to add a route map to override the default source address. The configuration is mostly the same, but note the few minor differences:
quagga(config)# route-map RM_SET_SRC6 permit 10
quagga(config-route-map)# set src 2001:db8::1
quagga(config-route-map)# ipv6 protocol bgp route-map RM_SET_SRC6
Next, enter BGP configuration mode for your AS again and configure the required neighbours accordingly:
quagga(config)# router bgp 64497
quagga(config-router)# neigh fc00:abcd:1234::1 remote-as 4242420171
quagga(config-router)# neigh fc00:abcd:1234::1 interface eth1
By default, Quagga will configure each neighbour as an IPv4 neighbour. In order to switch a neighbour to IPv6, you'll need to disable it within the default IPv4 configuration, and then enable it under the IPv6 address family:
quagga(config-router)# no neigh fc00:abcd:1234::1 activate
quagga(config-router)# address-family ipv6
quagga(config-router-af)# neigh fc00:abcd:1234::1 activate
Once you've done this for each neighbour, the initial IPv6 BGP configuration has been completed. You can exit configuration mode and write your configuration to disk:
quagga(config-router-af)# exit
quagga(config-router)# exit
quagga(config)# exit
quagga# write
Viewing BGP Peering Session Info and Routes
Once you've completed your initial BGP configuration, Quagga should automatically establish connections to your peers and begin exchanging routing information.
The first thing to check is a summary of BGPd's connection status, which will show how many active sessions are open and how many routes have been received:
quagga# show ip bgp summary
The above command can be abbreviated to sh ip b s.
Below is an example output from my own Quagga BGP router:
BGP router identifier 172.20.32.97, local AS number 4242420171
RIB entries 826, using 90 KiB of memory
Peers 1, using 9088 bytes of memory

Neighbor V AS MsgRcvd MsgSent TblVer InQ OutQ Up/
Down State/PfxRcd
192.168.163.29 4 4242423914 286 8 0 0 0 00:
03:00 427

Total number of neighbors 1

Total num. Established sessions 1
Total num. of routes received 427
Next, you can view a list of routes that you have received from your peer(s):
quagga# sh ip bgp
This will yield an output similar to the below example:
BGP table version is 0, local router ID is 172.20.32.97
Status codes: s suppressed, d damped, h history, * valid, > best, = multipath,
              i internal, r RIB-failure, S Stale, R Removed
Origin codes: i - IGP, e - EGP, ? - incomplete

   Network          Next Hop            Metric LocPrf Weight Path
*> 10.23.0.0/16     192.168.163.37                         0 4242423914 4242420880 65043 65210 i
*> 10.26.64.0/18    192.168.163.37                         0 4242423914 76190 4242420022 i
*> 10.37.0.0/16     192.168.163.37                         0 4242423914 4242420880 65043 65037 i
*> 10.50.0.0/16     192.168.163.37                         0 4242423914 4242422950 65024 i
*> 10.56.0.0/16     192.168.163.37                         0 4242423914 4242420880 65043 65037 i
...
You can also do the same for IPv6:
quagga# sh ipv6 bgp
This will show all of the IPv6 routes that you have received, similar to the example from my own router:
BGP table version is 0, local router ID is 172.20.32.97
Status codes: s suppressed, d damped, h history, * valid, > best, = multipath,
              i internal, r RIB-failure, S Stale, R Removed
Origin codes: i - IGP, e - EGP, ? - incomplete

   Network          Next Hop            Metric LocPrf Weight Path
   fd00:bad:f00d::/48
                    ::                                     0 4242423914 4242422341 4242420899 i
   fd00:191e:1470::/48
                    ::                       0             0 4242423914 4242422601 4242421470 i
   fd00:1926:817::/48
                    ::                                     0 4242423914 4242421331 i
   fd00:4242:3348::/48
                    ::                                     0 4242423914 4242422950 4242423348 i
...
Finally, you can also directly interrogate your system routing table in order to make sure that Quagga has installed the routes correctly. You can do this for individual IP addresses using ip route get, or print out the full routing table:
$ ip route
Use the -6 argument to view the IPv6 routing table too:
$ ip -6 route
This will result in something similar to the following example from my own router:
default via 172.16.0.1 dev eth0 proto static
10.23.0.0/16 via 192.168.163.37 dev tun-kioubit proto zebra src 172.20.32.97 metric 20
10.26.64.0/18 via 192.168.163.37 dev tun-kioubit proto zebra src 172.20.32.97 metric 20
10.37.0.0/16 via 192.168.163.37 dev tun-kioubit proto zebra src 172.20.32.97 metric 20
10.50.0.0/16 via 192.168.163.37 dev tun-kioubit proto zebra src 172.20.32.97 metric 20
...
Part 2 / Conclusion
You've now completed your initial Quagga BGPd configuration, and are successfully exchanging routing information with your peers.
In the next part, we'll look at various ways of preventing transit, which is a preferable configuration if you're not an ISP and don't want your router to share arbitrary routes with peers.